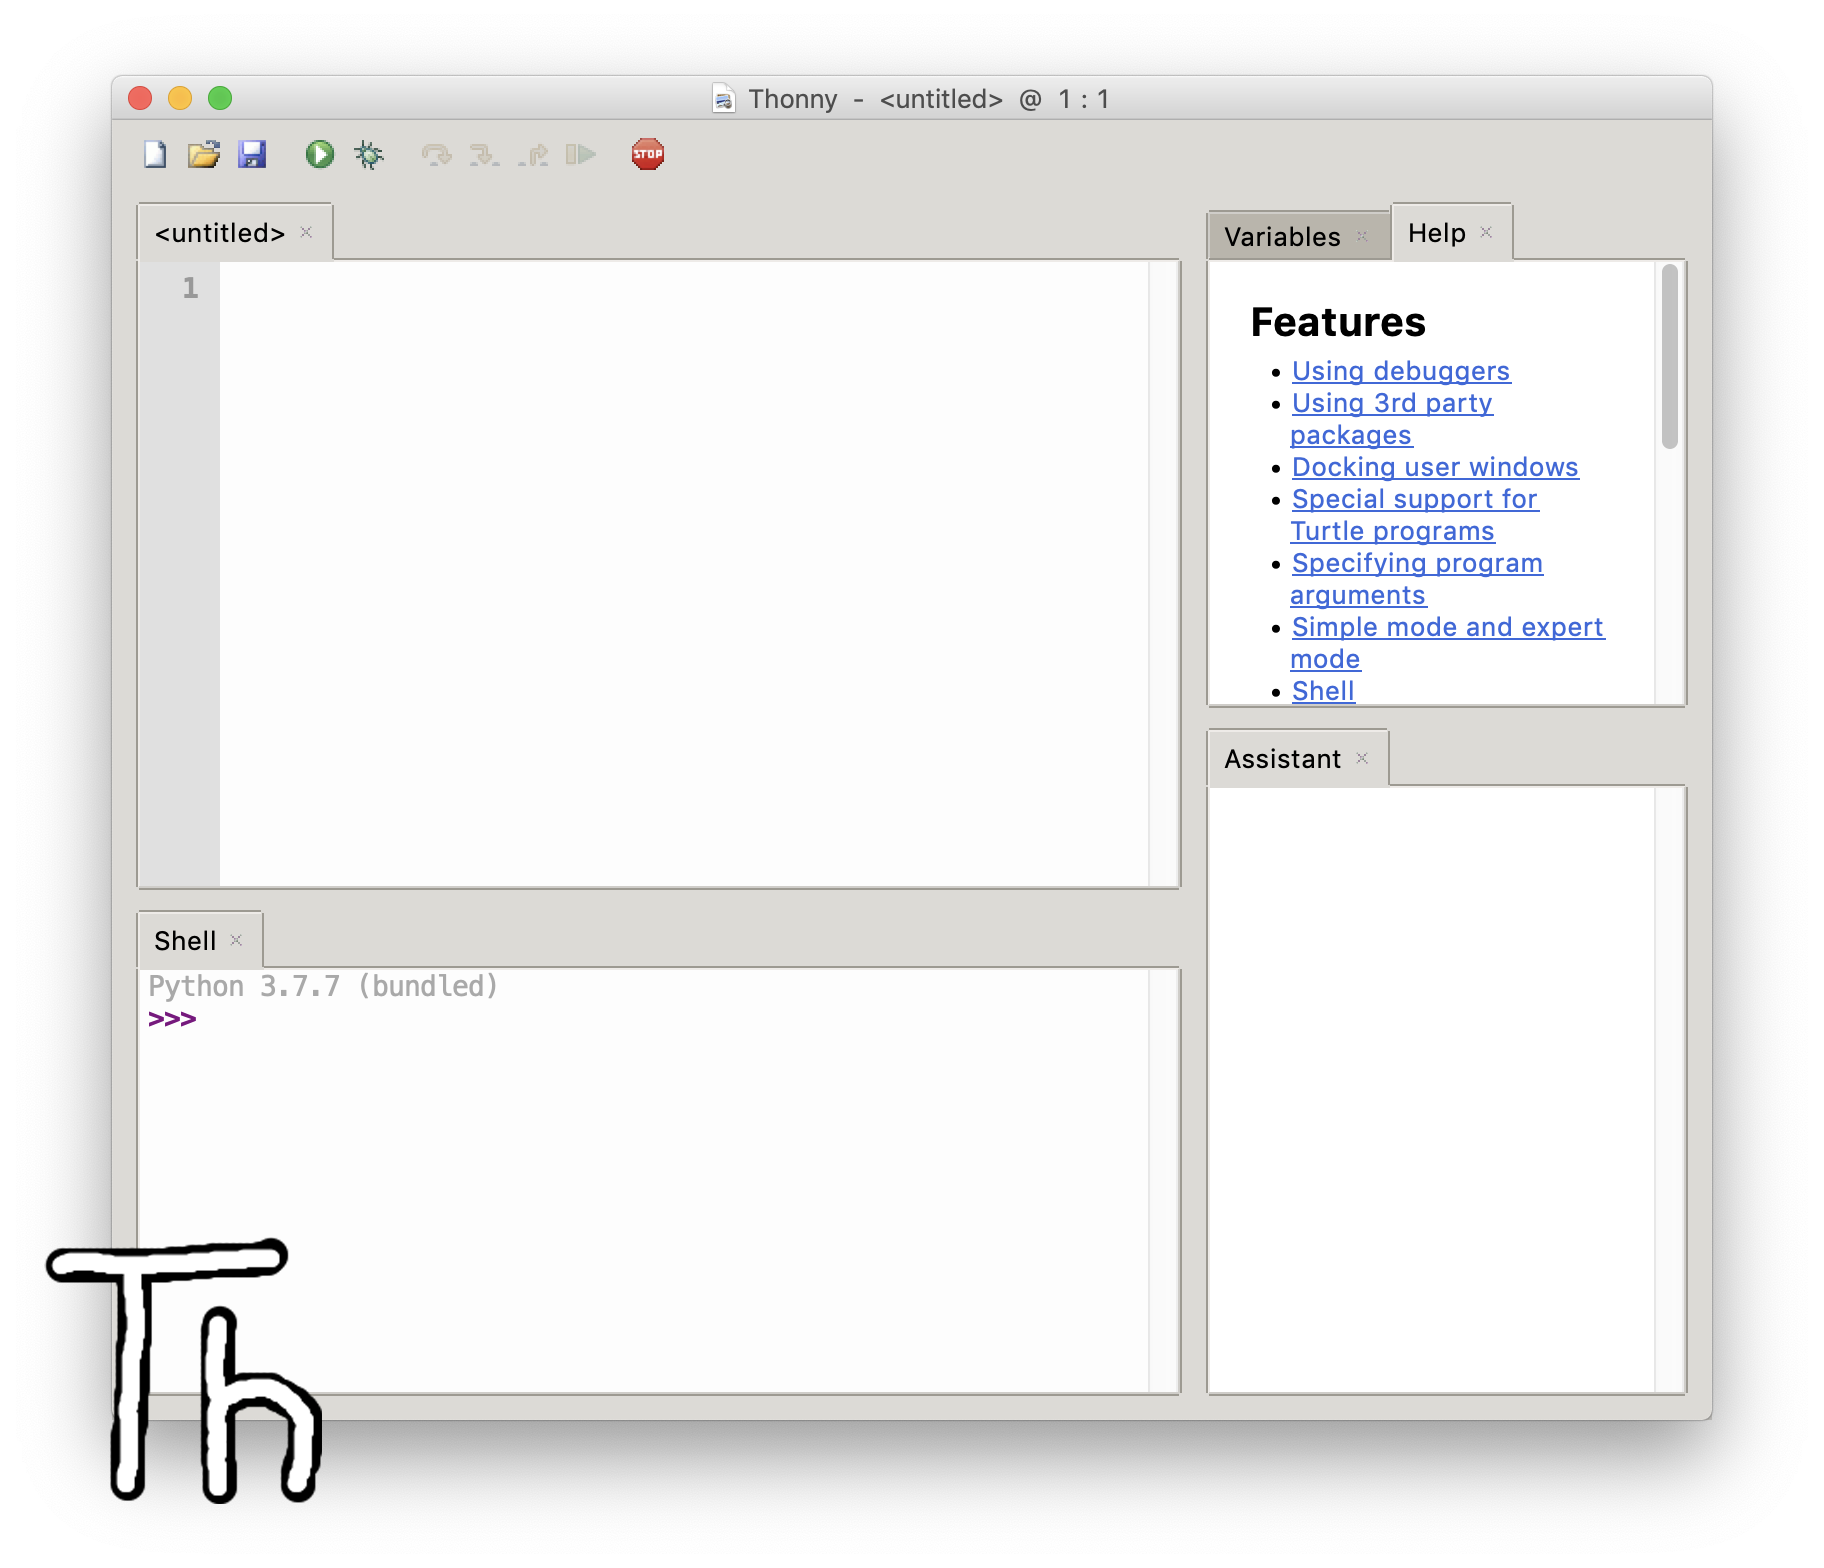
Lab 1: Thonny
In this course, we'll edit and run our Python code using Thonny.
Tip: To download Thonny on your personal computer at home, see the Software section of this website (Reference > Software).
Step 0) On your computer, using Spotlight, find and open Thonny.

Once Thonny is open, we want to create a Python file for today's lab and save it in the lab01 folder on your desktop. Here are the steps to do that...
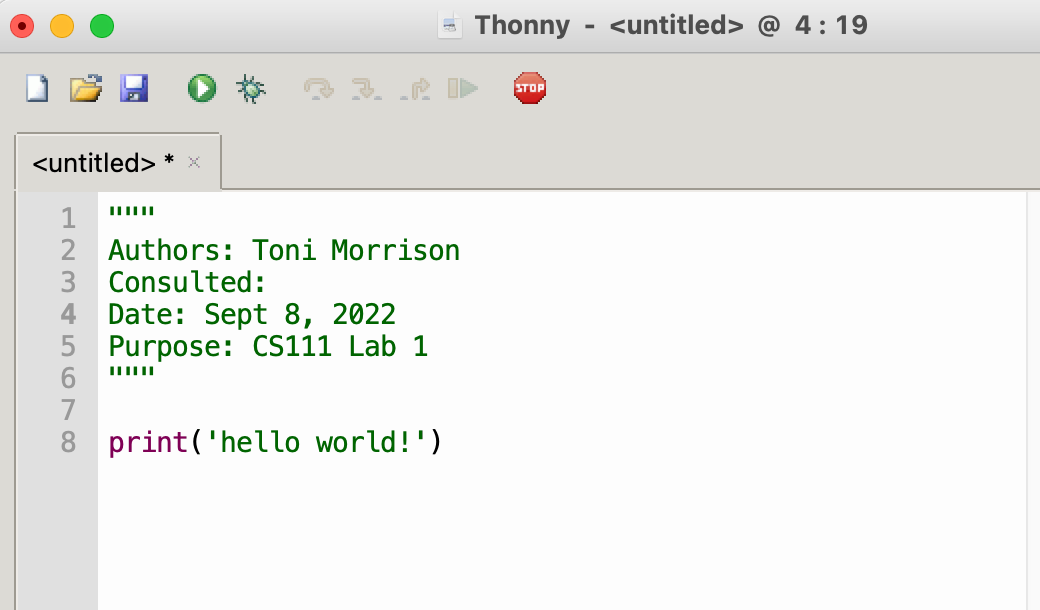
Step 1) In the Untitled window, start out with this Python code, replacing the first line with your name and your partner's name.
"""
Authors: Toni Morrison
Consulted:
Date: Sept 2, 2025
Purpose: CS111 Lab 1
"""

print('hello world!')
The first six lines are a "docstring" (short for documentation string, where 'string' is just a fancy word for 'text') identifying the file and you should follow this pattern for all files you create in this course.
The final line is a simple print statement we'll use in a moment to confirm our program is running.
Your Thonny editor window should look like this):
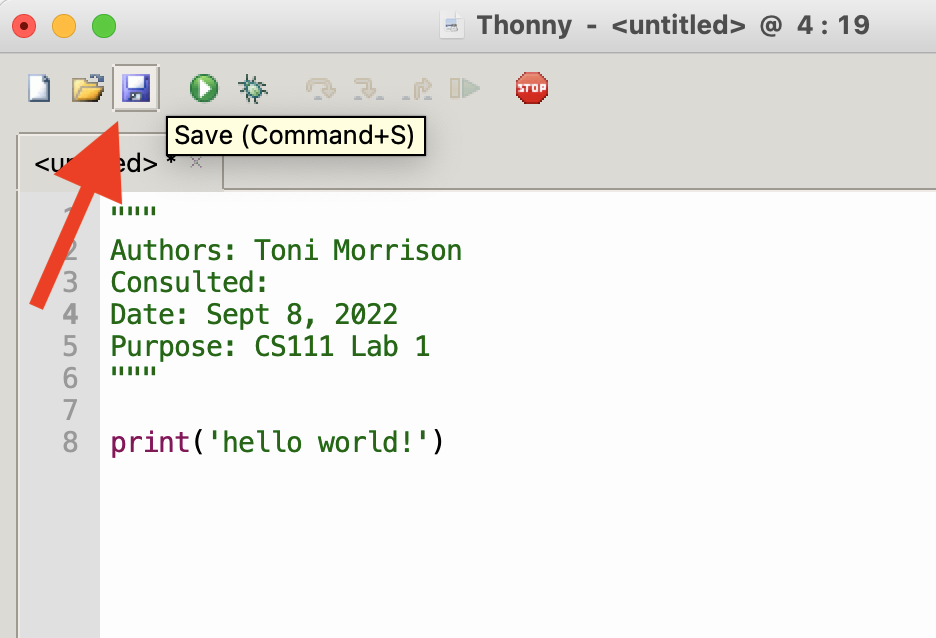
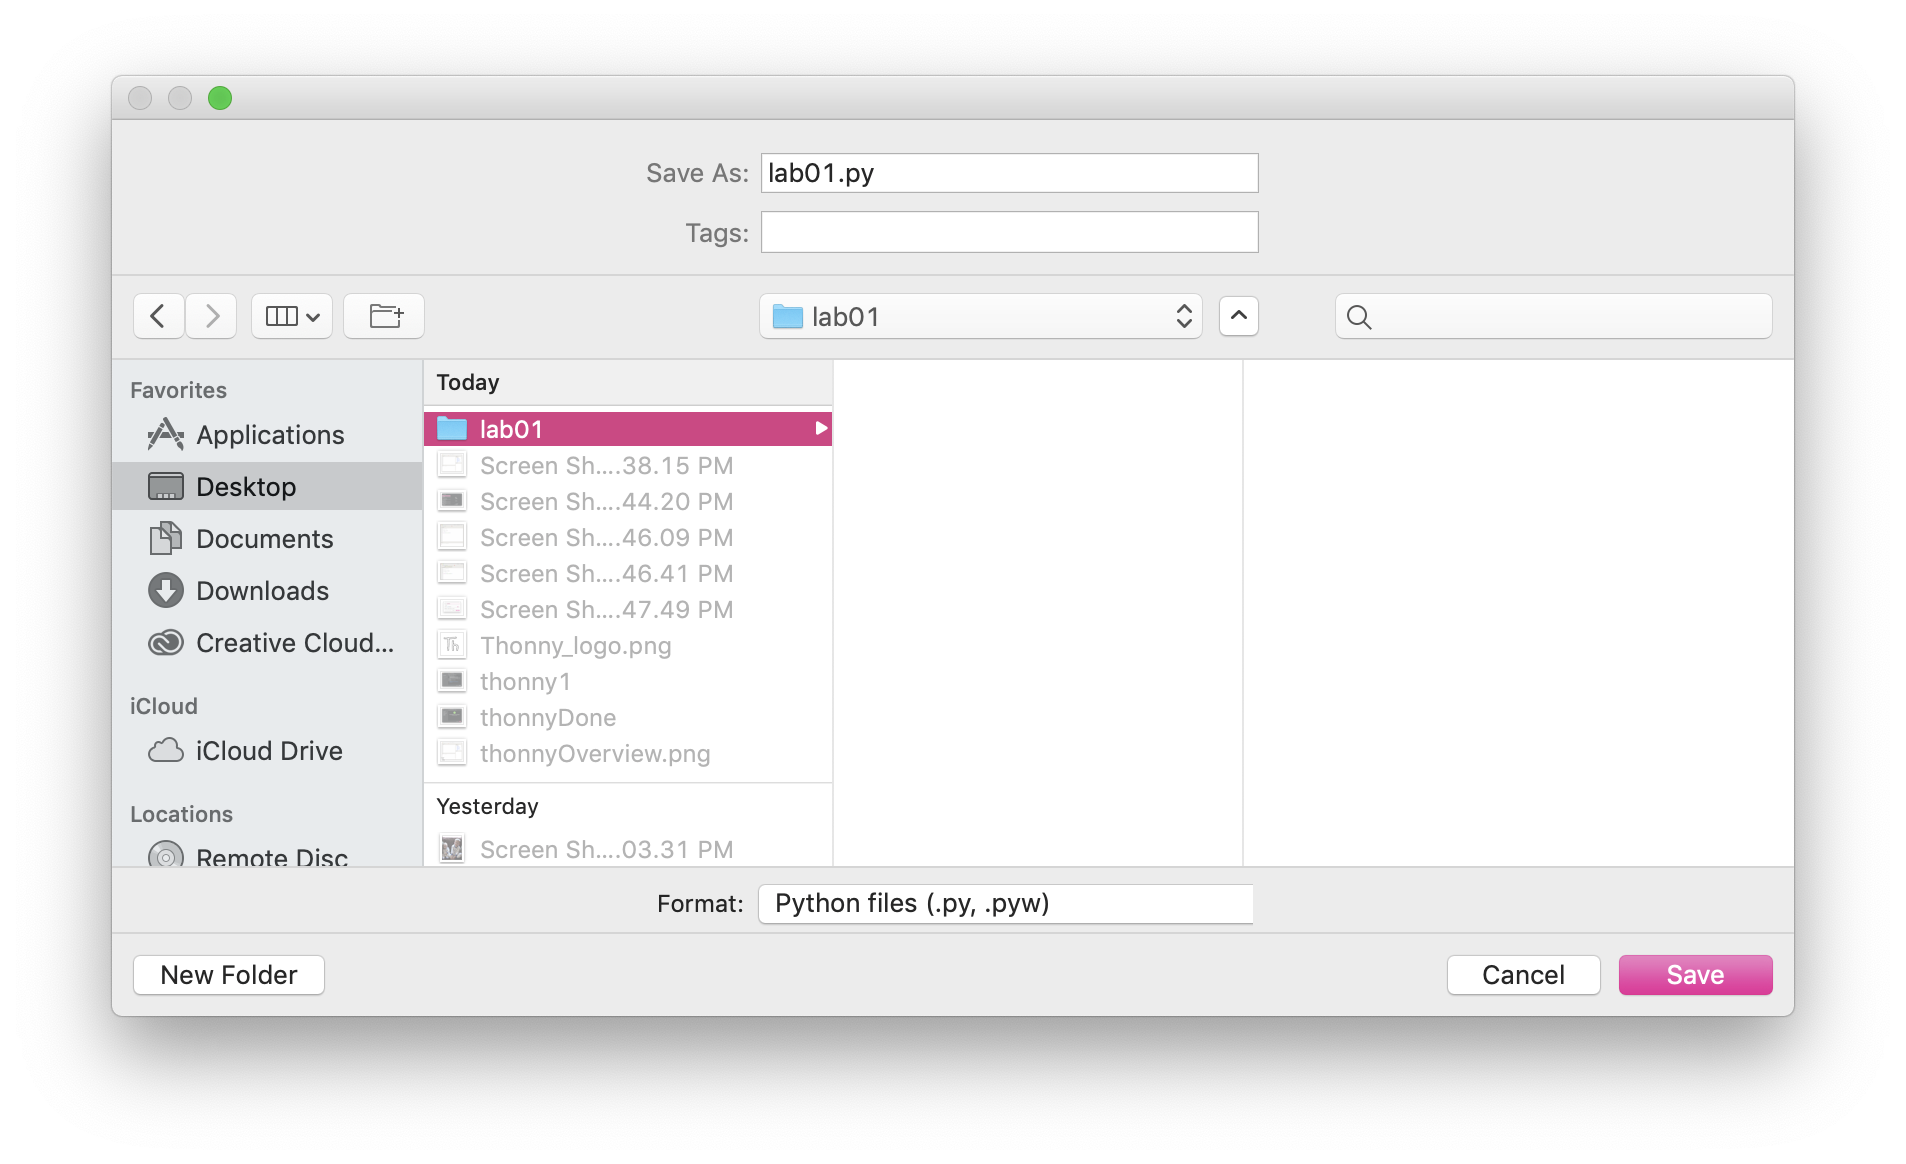
Step 2) Save the file as lab01.py in your lab01 folder on your Desktop.
Click on the save icon in the upper left corner of the Thonny window
Clicking on "Save" opens this window where you can type the name of the file lab01.py.
Make sure you are saving the file in your lab01 folder and not on the Desktop.
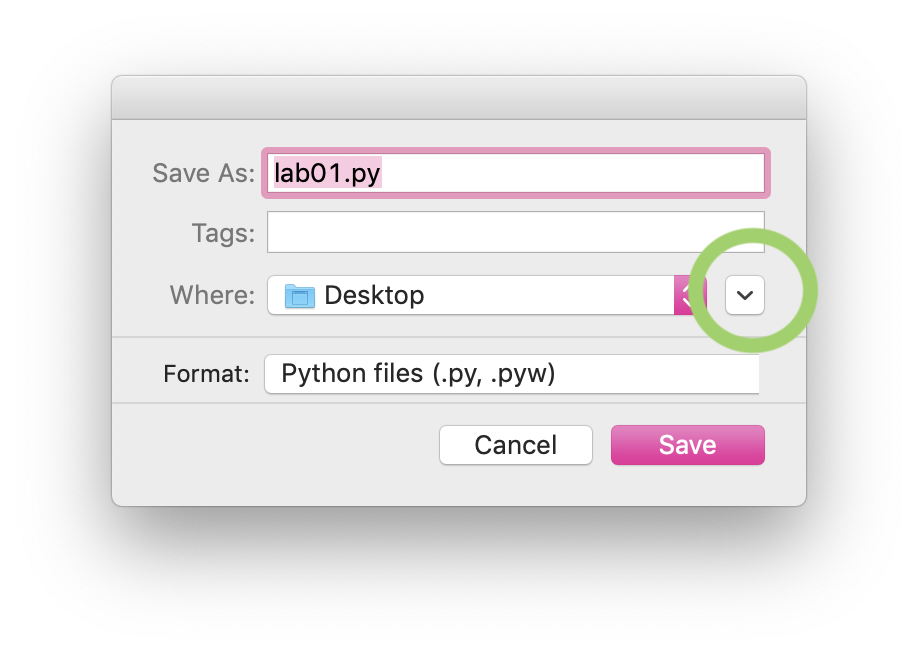
You may need to click on the little down arrow (circled in green above) in order to select
the lab01 folder before saving your lab01.py file.
Quick check: open your lab01 folder on your Desktop and verify that your lab01.py folder is in there.
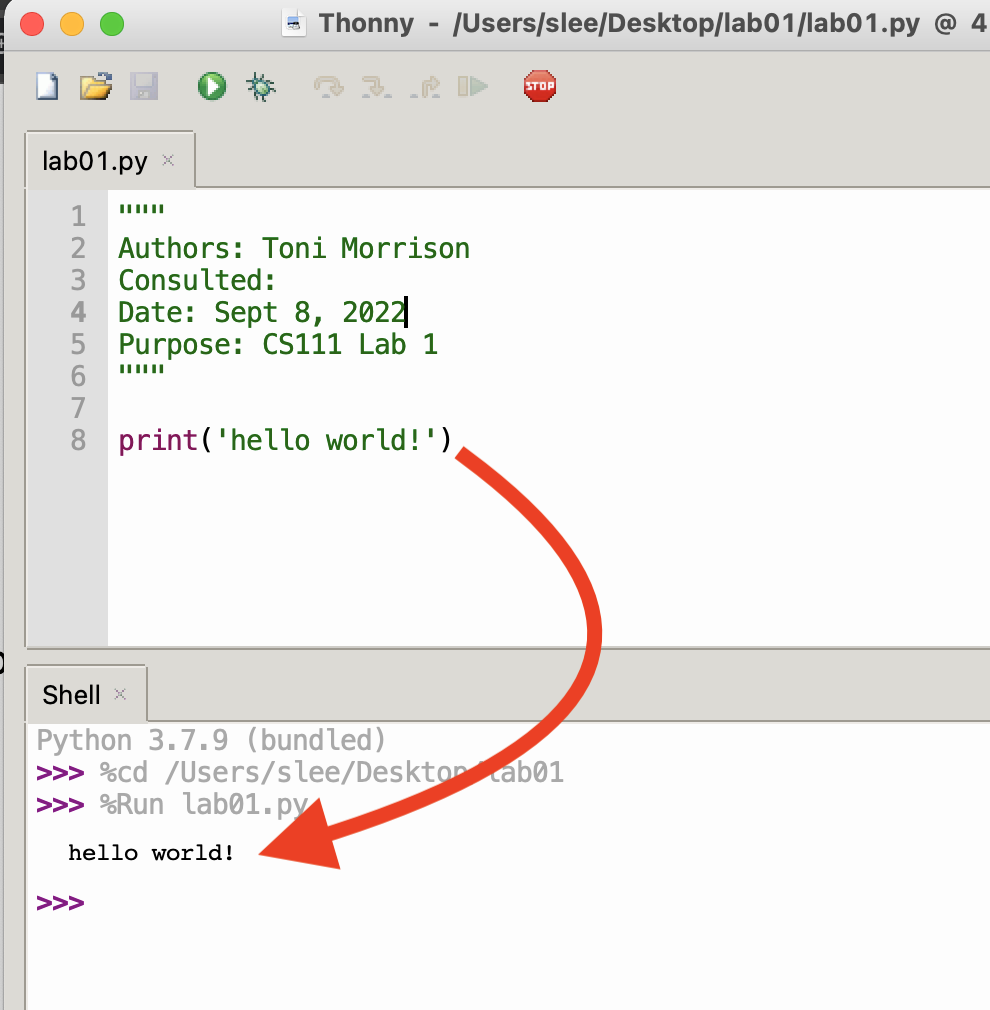
Run your file
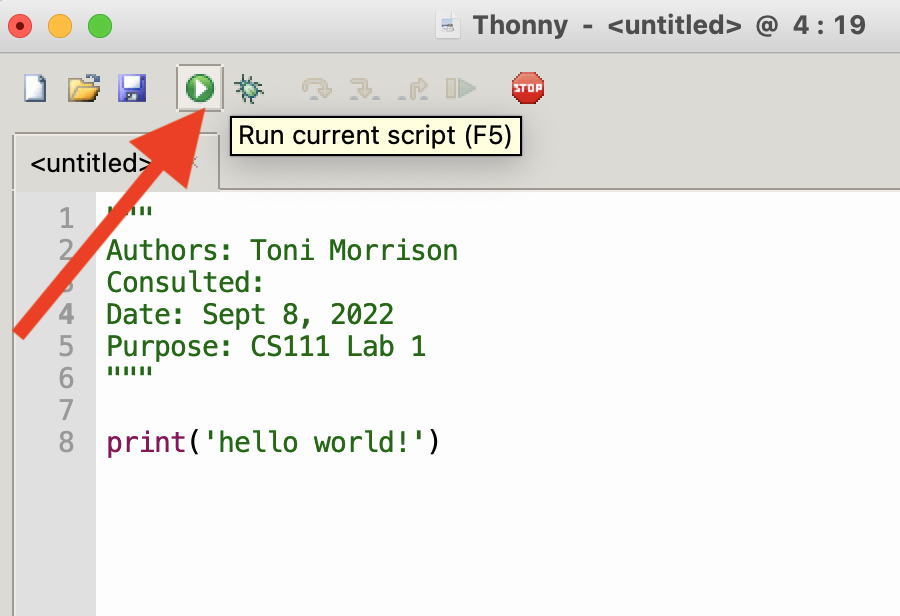
You can run your file via one of the following methods:
- Click on the Run Button (green arrow)
- In the menubar, go to Run :: Run Current Script
- Use the keyboard shortcut F5
In this case, you'll know your program succesfully ran because it should say hello world! in the Python Shell, as shown below:
Summary
Learn the terms editor, shell and assistant in Thonny; we'll use these throughout the semester.
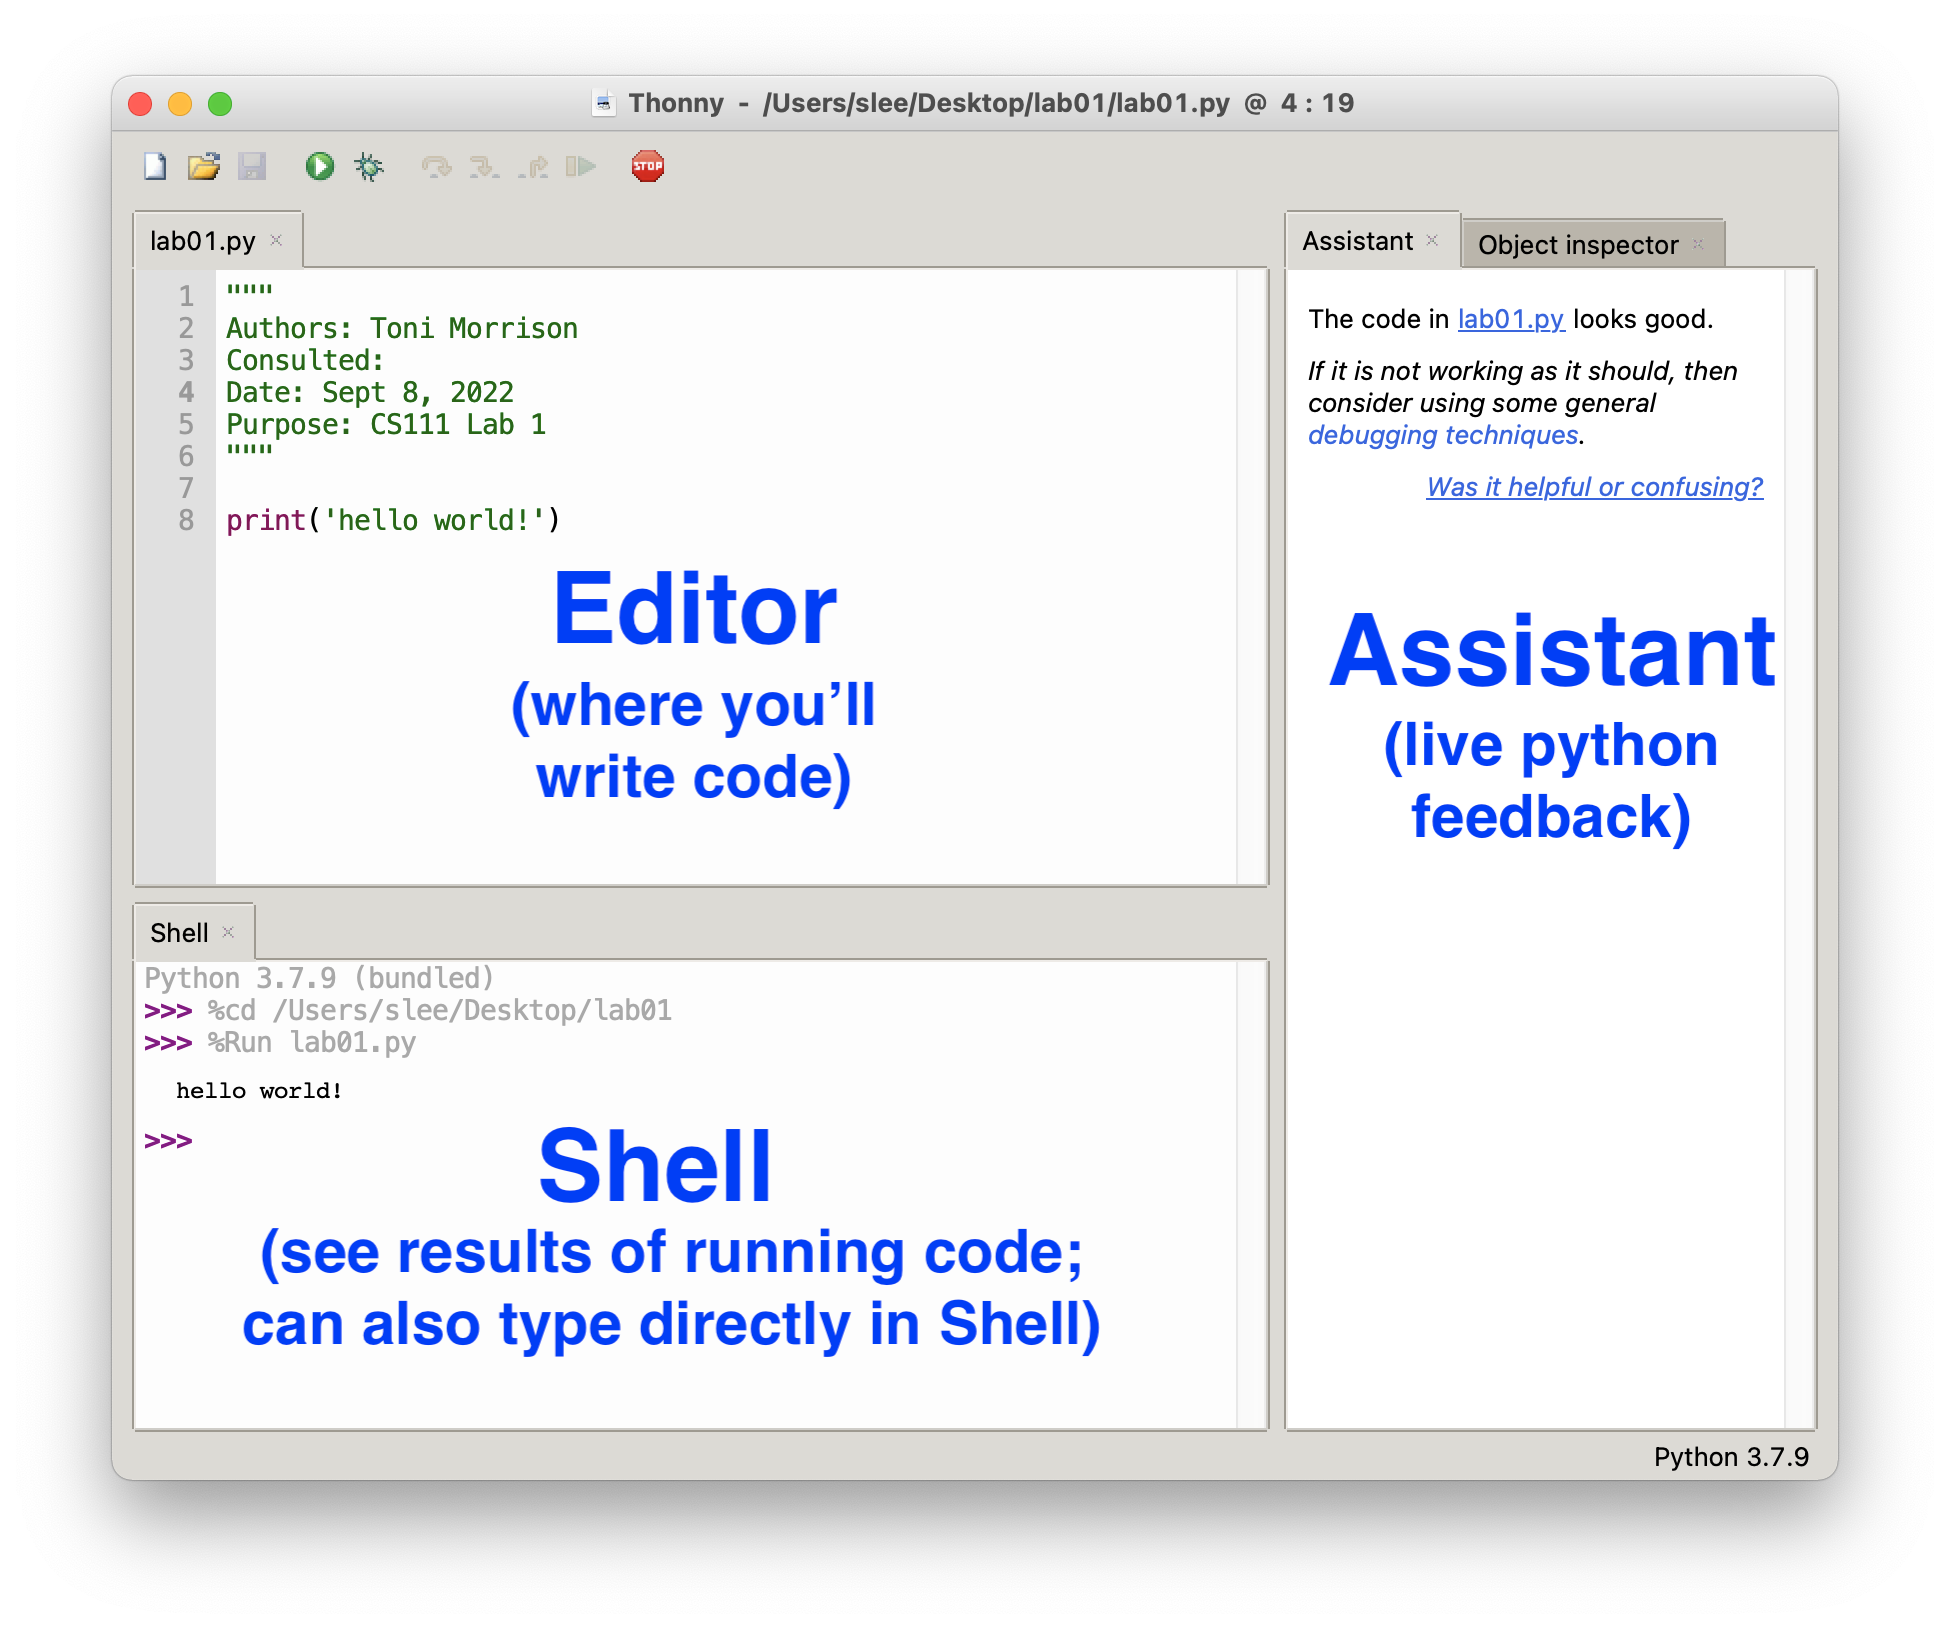
Table of Contents
- Lab 1 Home
- Part 1: Thonny intro
- Part 2: How to work on projects
- Part 3: Your first program
- Part 4: Multimedia exercises
- Part 5: Save your work