Software for CS111
This page provides links to download software for this class onto your personal laptop. In an ideal scenario, all three programs would be downloaded to your personal laptop before the first day of class.
CS111 students need the following:
- Thonny (to write/run Python code)
- Download and run a test Jupyter notebook (see details below)
- Test the
111Downloader.pyscript on your computer (see details below)
If you encounter problems with the installation process, please email Prof. Lyn Turbak (fturbak).
Instructions
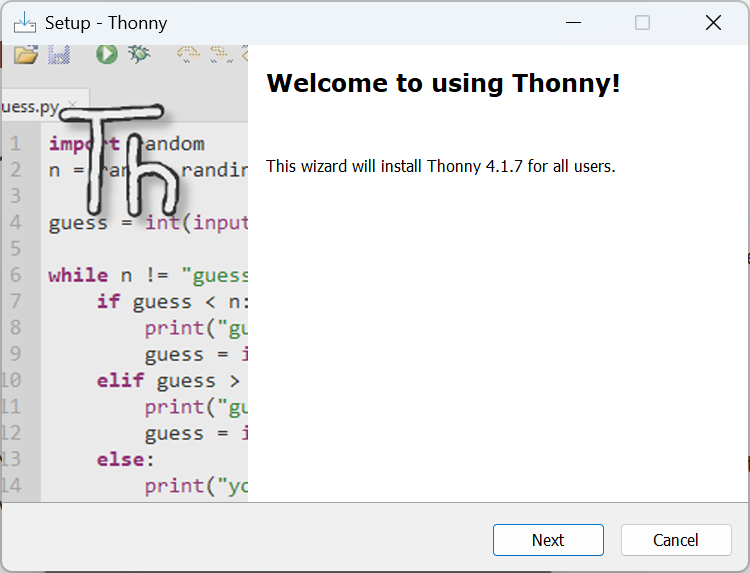
1. Thonny
 You can download installers for Thonny below. By clicking on the blue links below, the installer will automatically download to your machine. Double-click on the installer, and it will start the process of installing Thonny.
Only on Windows you will first be prompted to choose between installing for all users or not; choose whichever you prefer.

(On a Mac, it will install for all users by default; this can be changed later in the installation sequence.)
Next you'll see a screen like this when installer starts:
| Mac | Windows |
|---|---|
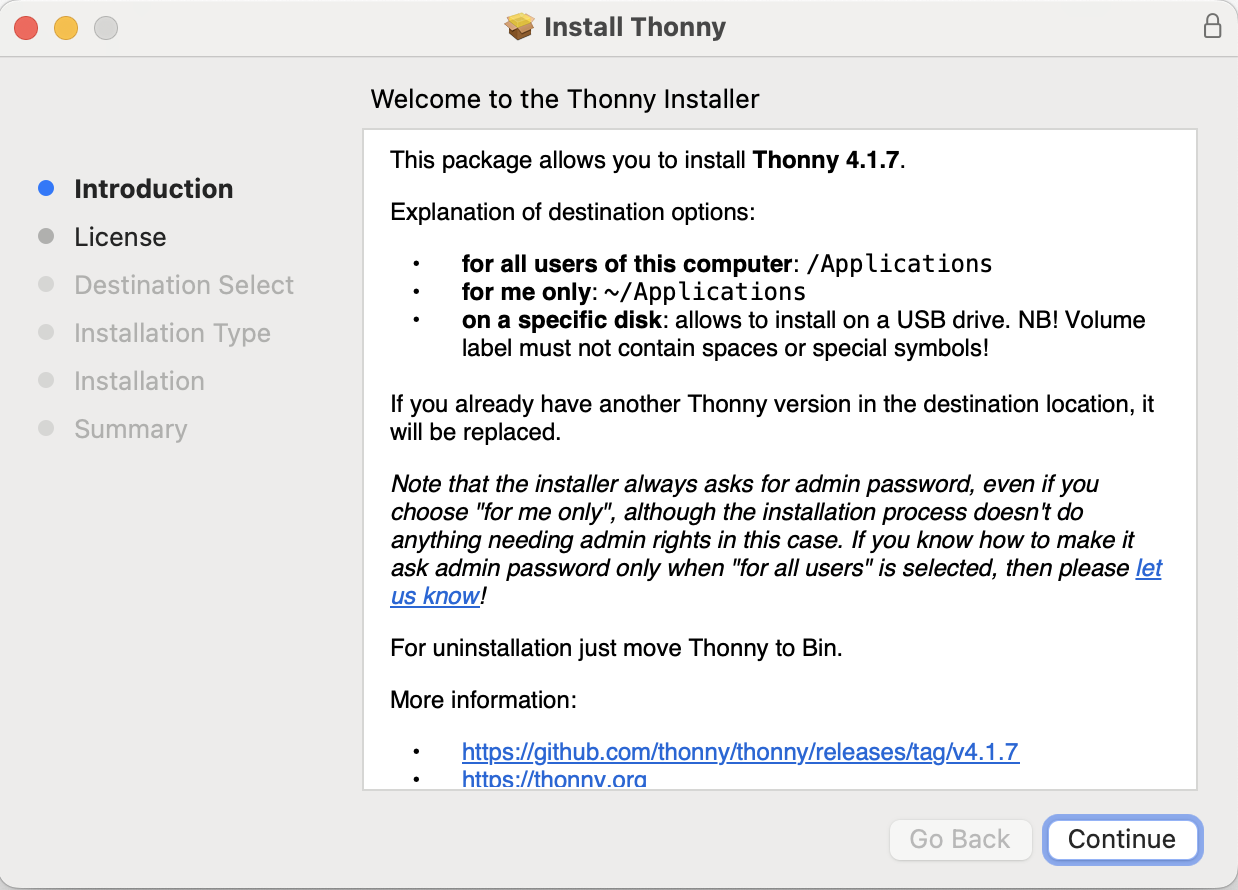
|
|
Click through each of the sections (License, Destination Select, Installation Type, Installation, Summary). When given options, if you are uncertain, use the default suggested by the installer. Eventually, you will arrive at this screen:
| Mac | Windows |
|---|---|
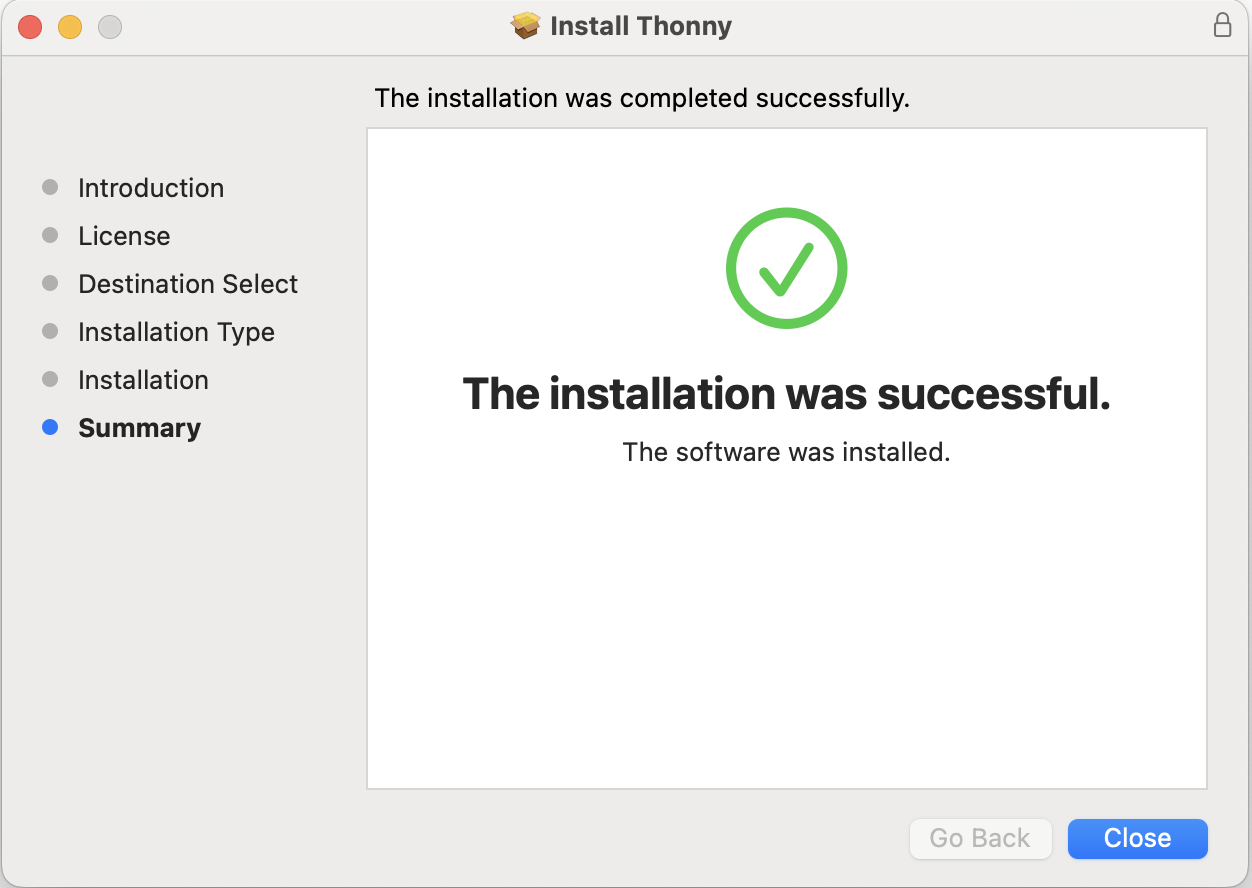 |
|
2. Test a Jupyter notebook
We'll use Jupyter notebooks in lab where you can write and run python code.
Please use this link to download a zip file containing the launchNotebook.py program and a Jupyter notebook for testing.
Instructions:
- Clicking on the link above should automatically download the
cs111_setup.zipfile to your computer. This file should end up in yourDownloadsfolder. - In the
Downloadsfolder, Unzip thecs111_setup.zipfile, which creates the foldercs111. Some systems automatically unzip the file to create the folder. If not, you'll need to do it manually:- To unzip a
.zipfile on a Mac, double-click it. - To unzip a
.zipfile on Windows, right-click and choose Extract all ... or Extract here.
- To unzip a
- Move this cs111 folder to a place where you want to keep it all semester. Your Desktop is one easy place to put it, but you could also put it in your Documents folder, your personal user folder, or some other folder where you keep your class files organized.
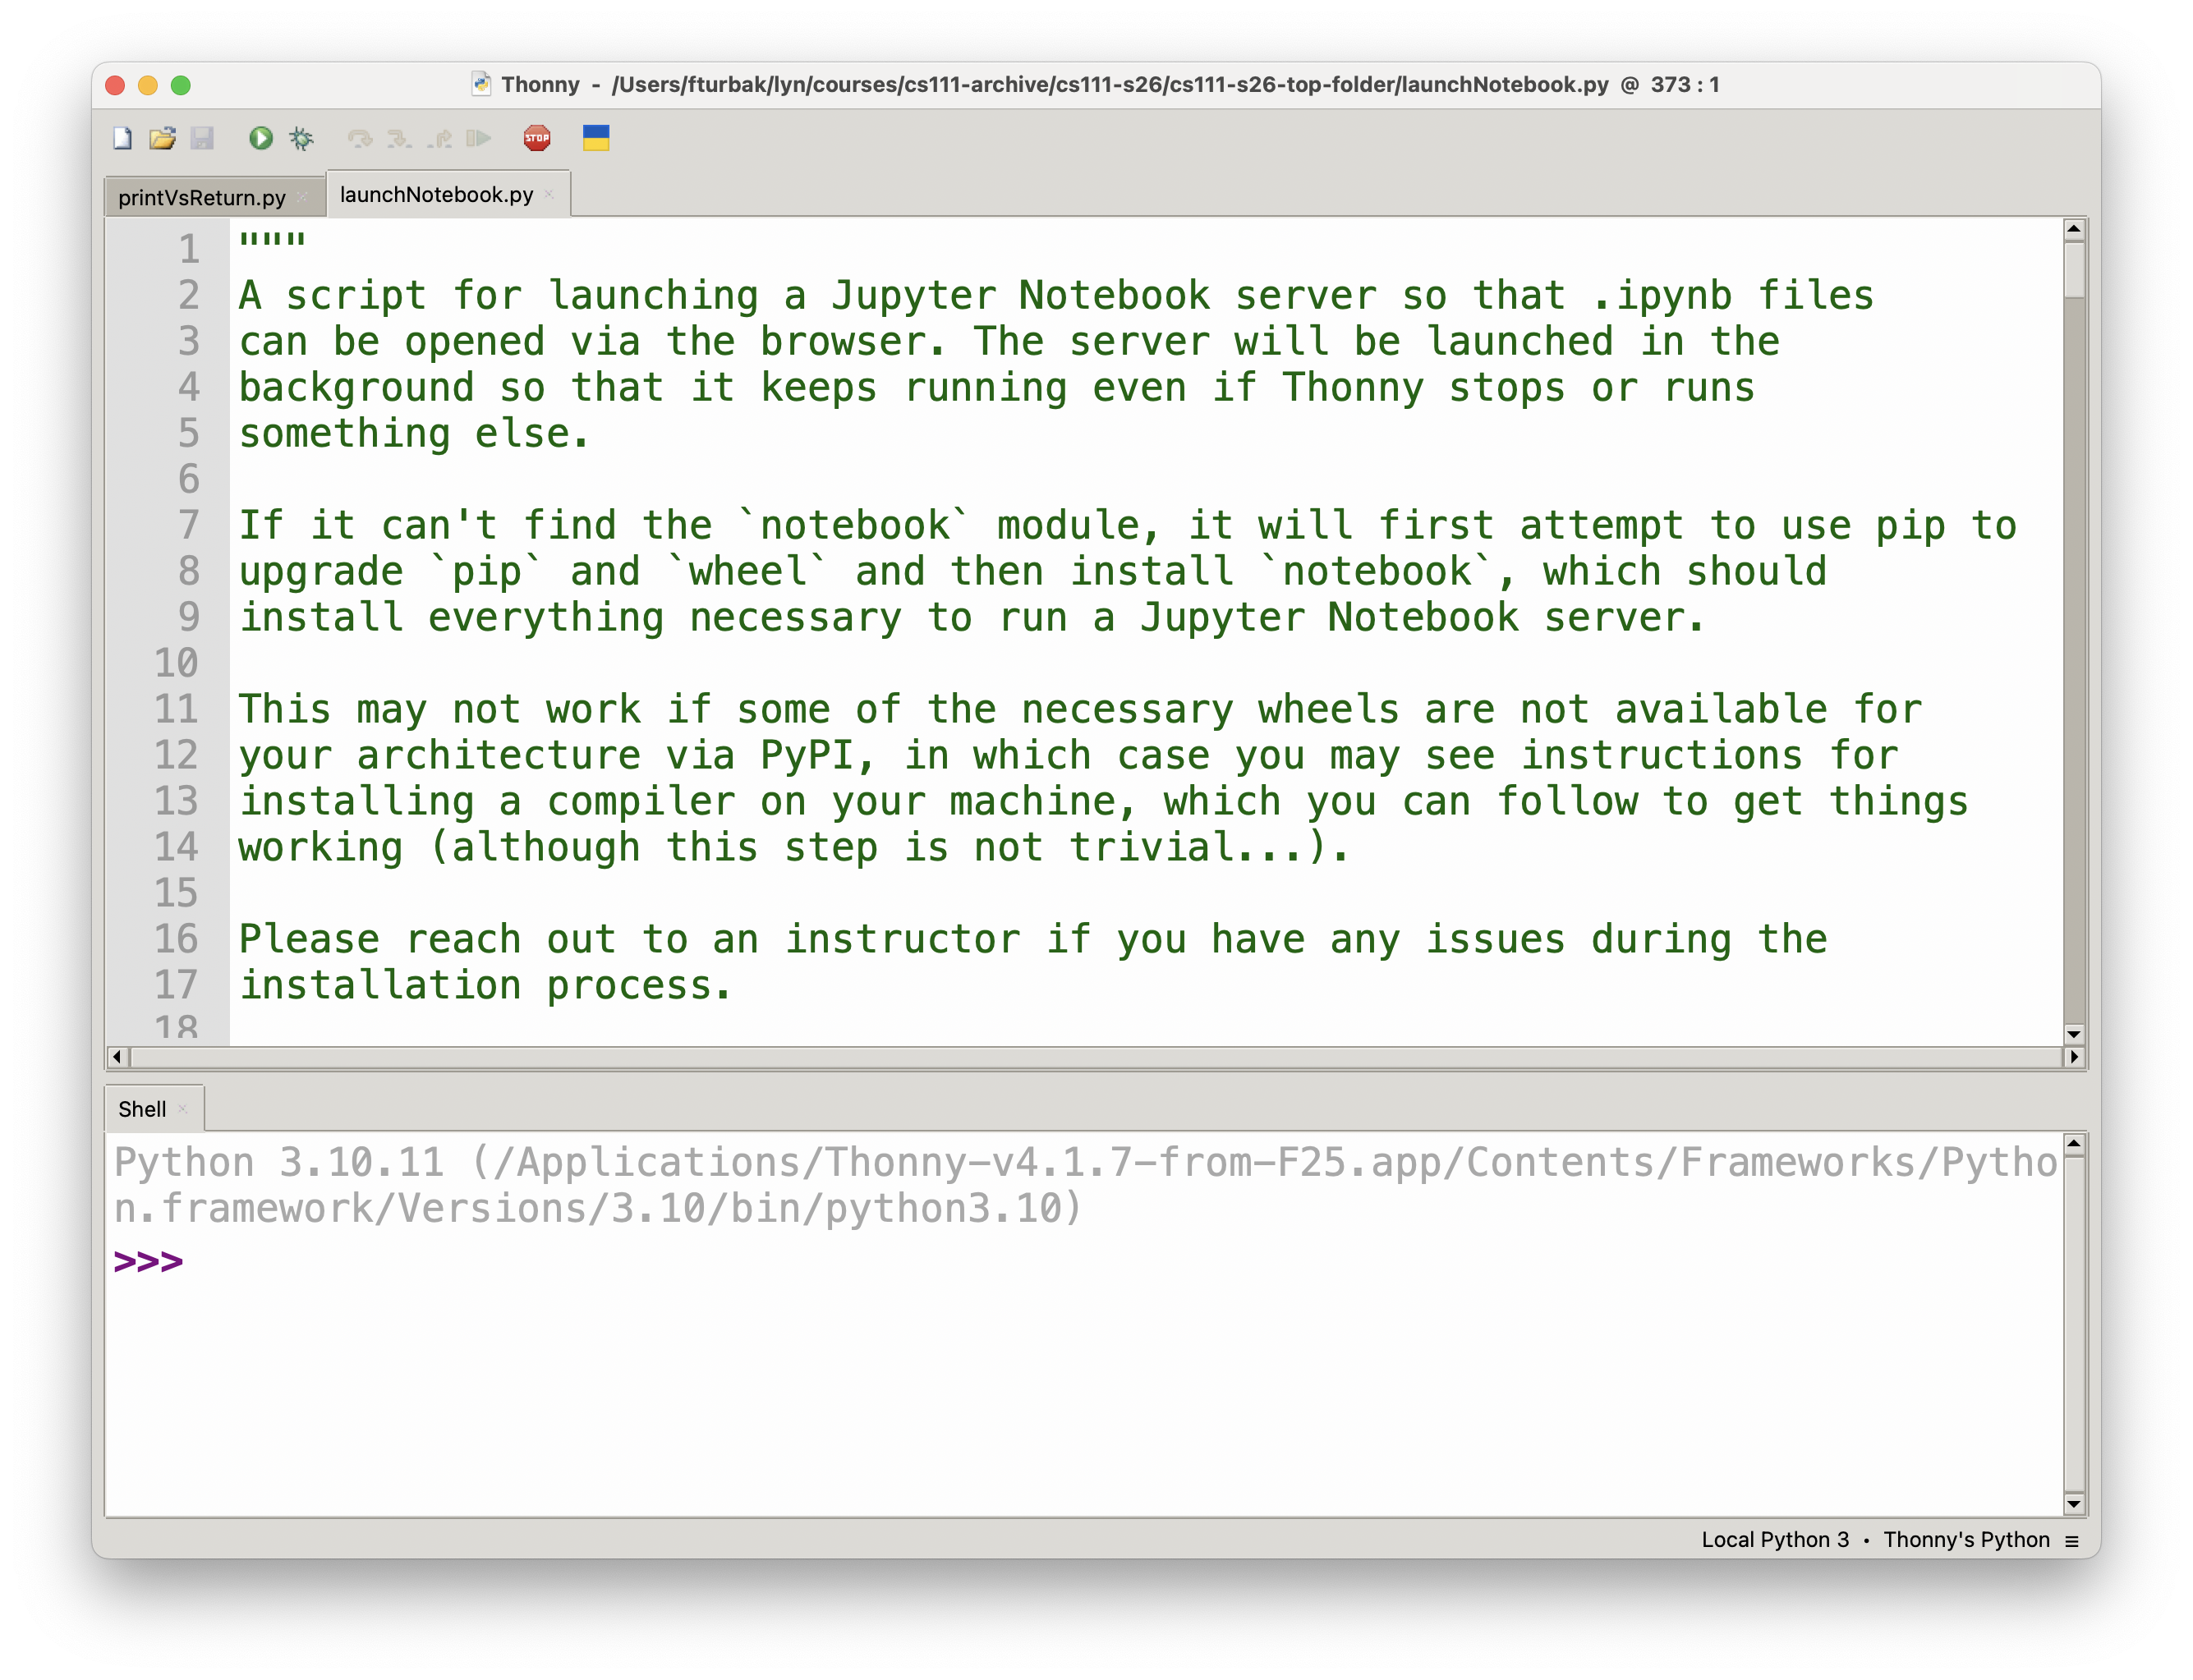
- Using Thonny, open the
launchNotebook.pyfile in thecs111folder, wherever you placed it. To do this in Thonny, from the File menu, select Open, and navigate to yourcs111folder, and thelaunchNotebook.pyfile within thecs111folder SelectlaunchNotebook.pyand press the Open button. At this point, your Thonny window should be displaying thelaunchNotebook.pyfile in the editor pane at the top of the window, and the Python shell at the bottom of the window should be mostly empty, like this:
-
Click the Thonny run button
 (or choose Run current script from the Run menu) to run the
launchNotebook.pyfile. It may take a moment because it has to install some things, but this should only be necessary once. It should display a bunch of output in the Pythton shell at the bottom of the Thonny window, and eventually launch a tab in your web browser, displaying the contents of thecs111folder. You will use this tab (which you can get back by runninglaunchNotebook.pyagain) to launch all of the notebooks for this class.Note: If you get an error message at this step saying "looks like this file or folder is not writeable" it probably means you are on Windows and have forgotten to unzip the zip file by right-clicking on it and selecting Extract all... or Extract here.
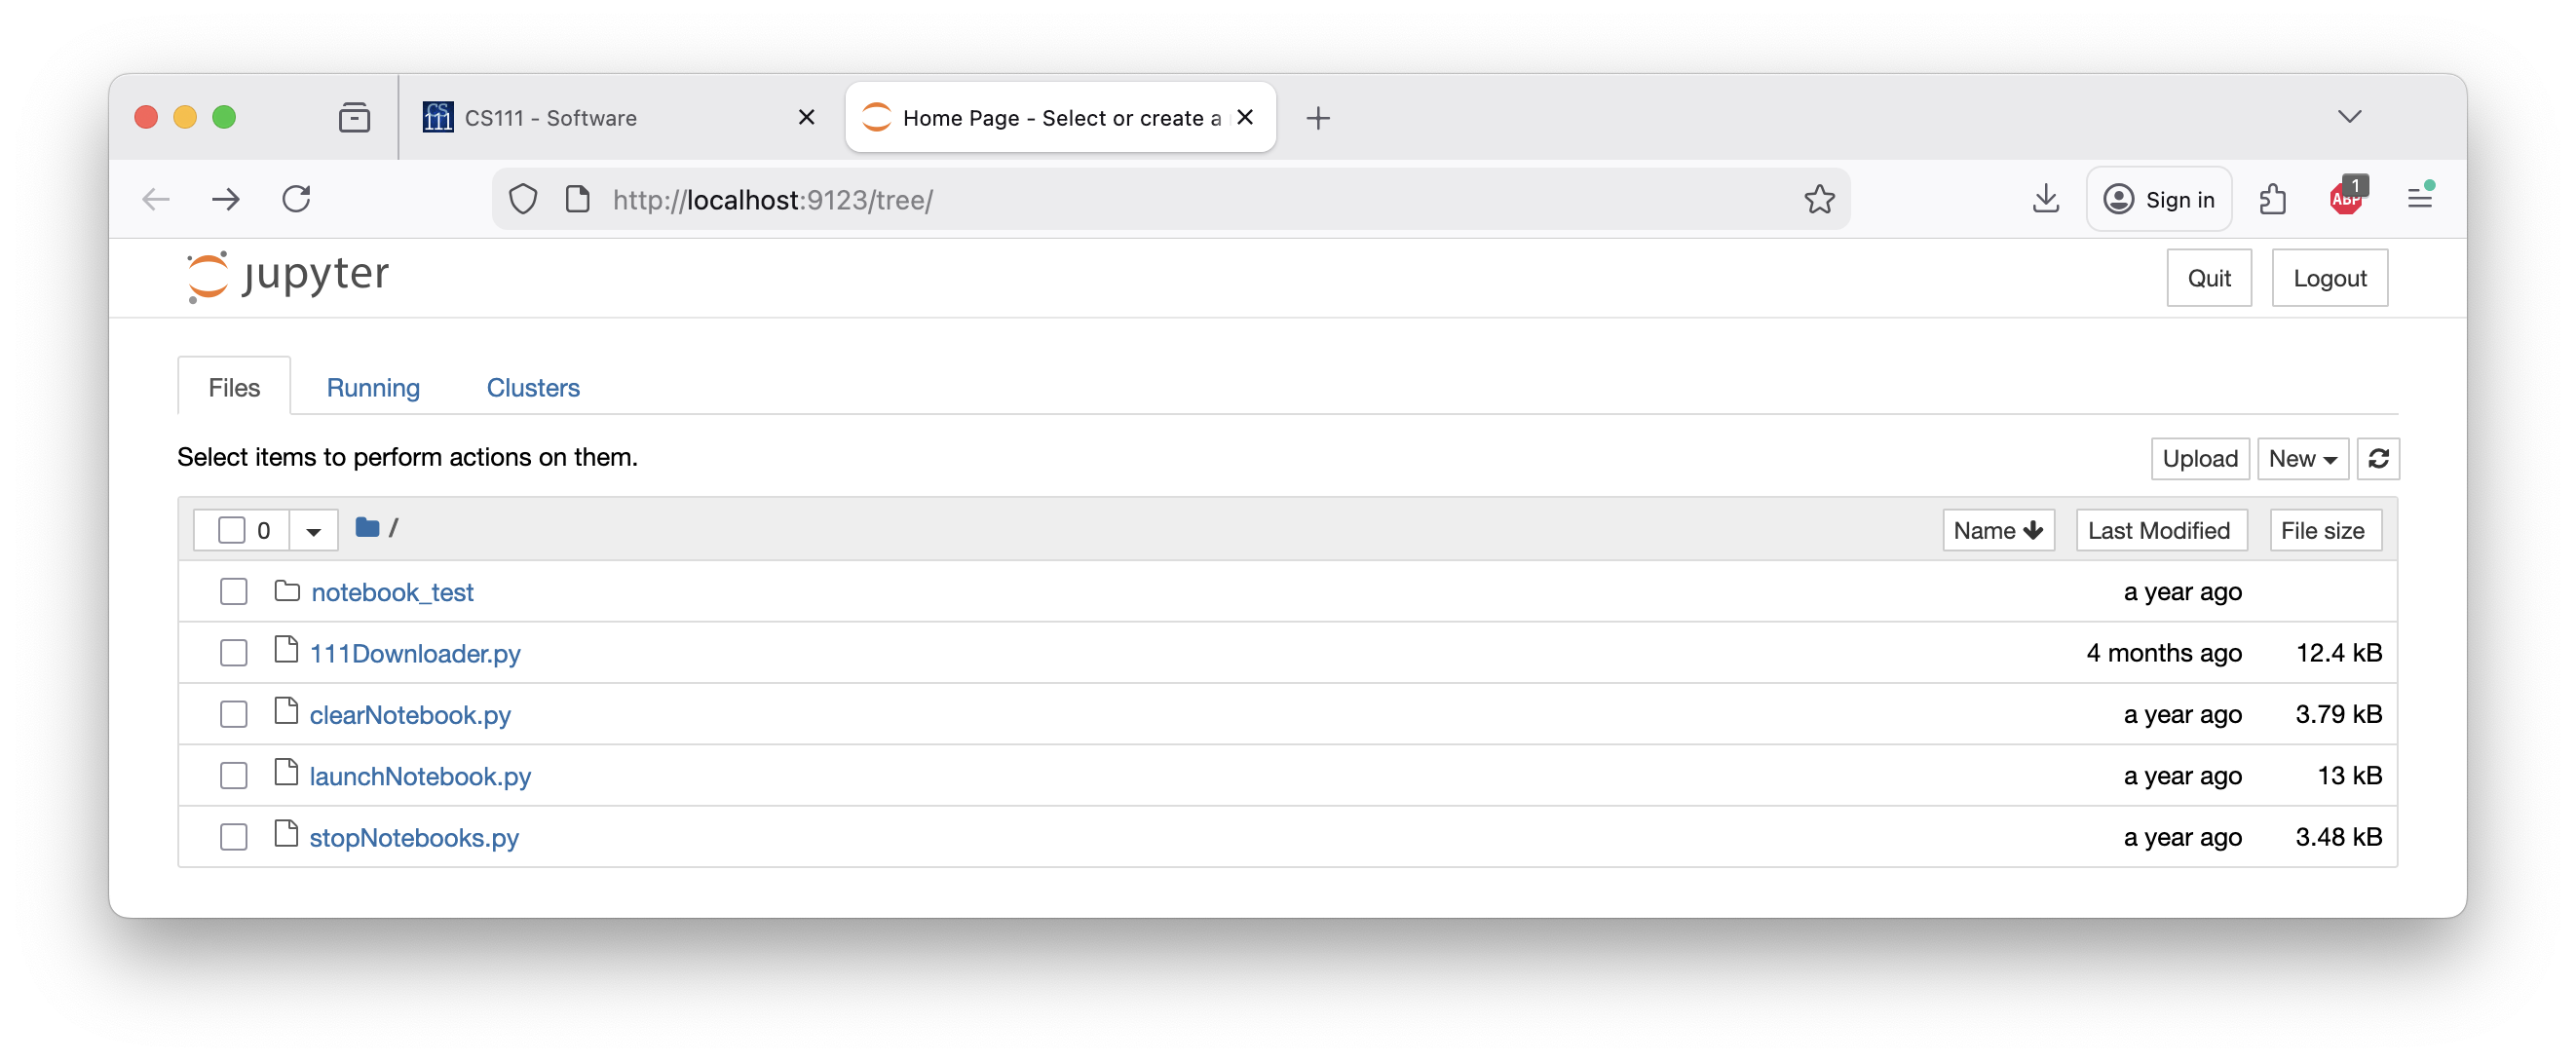
The browser tab that results from clicking the Thonny run button
for launchNotebook.pyshould look like this:
- In the browser tab, click on the the
notebook_testfolder, which will change the browser tab to look like this:

- Click on the
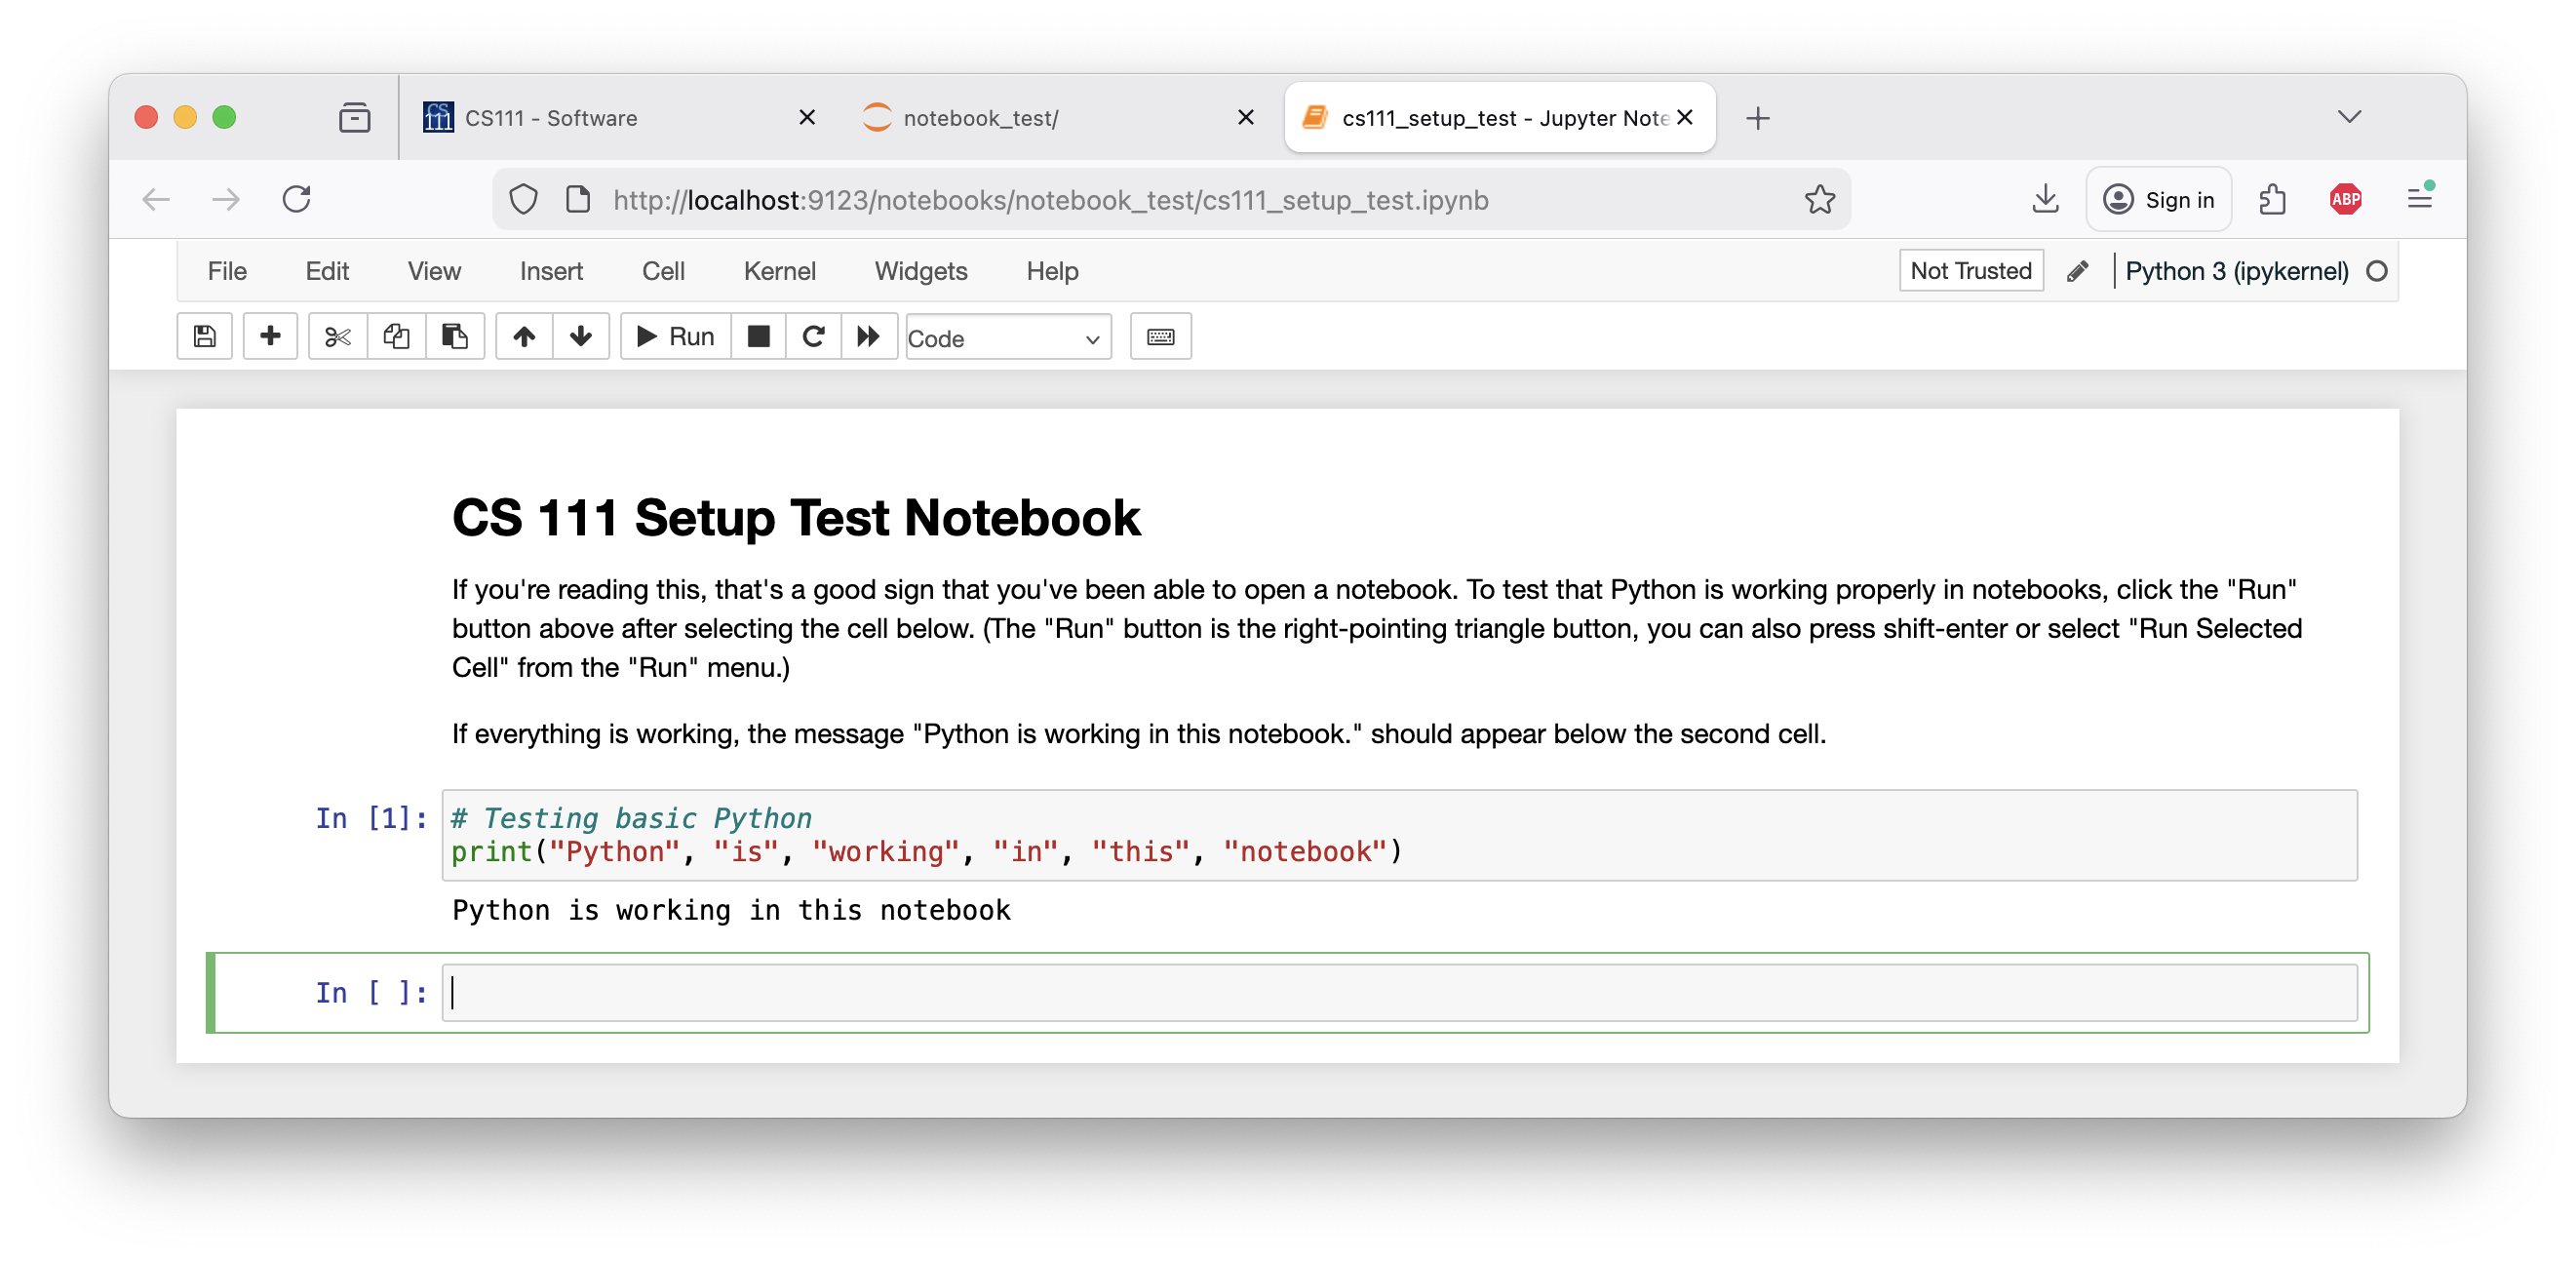
cs111_setup_test.ipynbfile in the browser tab. This will open a second browser tab which runs the notebook, and looks like this:
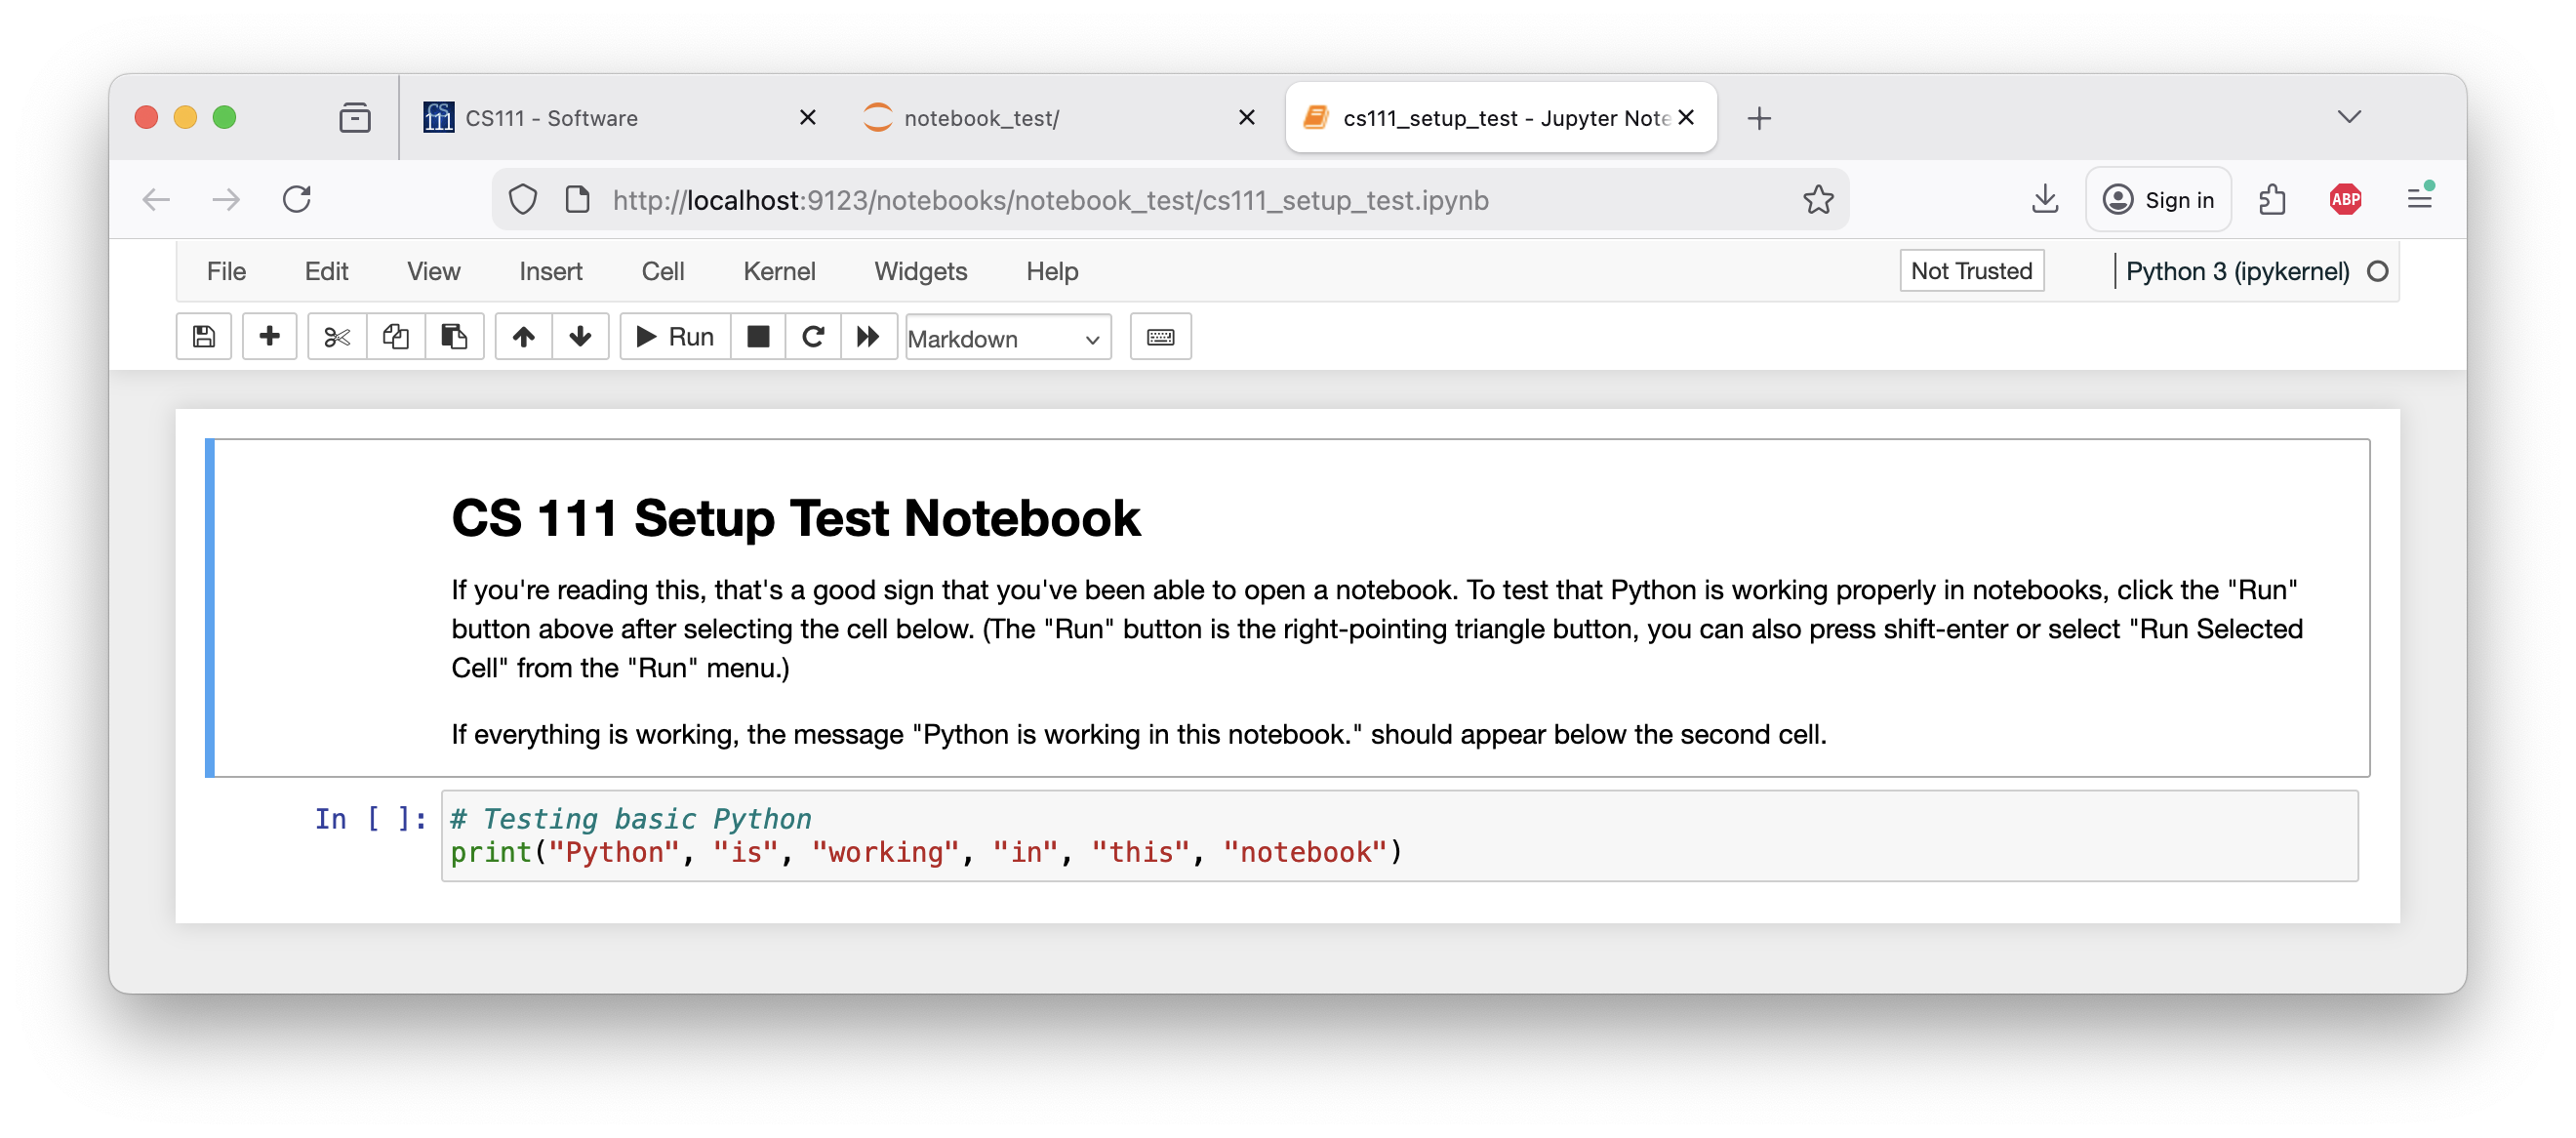
- Make sure the notebook is working. Follow the directions in the notebook and confirm that it displays the message "Python is working in this notebook" (in addition to the code which has that message along with extra quotation marks and commas). It should look like this:
If you run into trouble following these steps, please email Prof. Lyn Turbak (fturbak) for help.
For lectures and exercises in this class, you will be downloading zip files
containing notebooks. Once you have extracted these zip files, you should put
the resulting folders into the cs111 folder you created in this step.
3. Test the Downloader Script
For your convenience, we've provided a downloader script which checks the CS 111 website for updates and downloads any new files it finds, unzipping any zip files automatically. You can simply run this script to check for and download new lecture, exercise, project, and lab files. For now, you should run it once to make sure it works on your system, by following these instructions:
- The
111Downloader.pyscript is included in thecs111folder that you unzipped in the previous section. Just likelaunchNotebook.py, open it using Thonny. - Run the script, and it should display messages about what it's searching for and what it downloads. For now, it should download at least the first week's exercises, since those are already linked on the schedule.
- Check your
cs111folder for a newexercisesfolder that contains a sub-folder for the week 1 exercises.
As before, if you have any problems running the downloader script please email Prof. Turbak (fturbak) for help.
Links to Notebook Launchers
These links have the most recent version of a few different scripts that
are useful for managing Jupyter Notebooks, in case you need to download them individually. Each of these is included in the cs111 folder you already downloaded, but they may be updated here if necessary as the semester progresses. If you need to re-download one of them, right-click and select "save as" to download the file.
- launchNotebook.py is the basic notebook launcher. We'll include copies of this in the zip files for lectures and exercises.
- stopNotebooks.py
can be run to stop any currently running notebooks. MAKE SURE YOU SAVE
YOUR WORK FIRST! Might be useful if
launchNotebookis getting stuck and refusing to launch a new server and/or if you have runlaunchNotebookmany times in different directories and want to clean things up a bit. - clearNotebook.py can be used to clear out all of output from a notebook. This can be useful if you've created an infinite loop that put too much output into a notebook for you to open it properly. You need to copy this file into the same directory as the notebook you want to clear out, then follow the instructions in the file.