Lab 1: How to work on projects
To access starter code and to turn in your projects, you will use the Potluck server. This page gives detailed instructions for using it, and will walk you through the process of submitting an "example" task that has been set up on the server for this purpose.
Potluck Overview
The Potluck server enables you to do the following:
- download starter code for a task
- upload your finished code
- obtain feedback on your uploaded code
- submit revisions and obtain feedback immediately
In order to use the server, you must first authenticate by logging into your Wellesley domain account (you will be prompted to do so).
Note that the example project is not worth any points!
Welcome to the Potluck server
Accessing starter files
For all tasks, there will be some starter files that we supply. To access them:
- Go to the CS111 Potluck Server.
- Authenticate by logging into your Wellesley domain account.
- Scroll down to the task you want to work on (for today, go to the Example Task which is at the top).
- Click on the "Download starter files link" on the right-hand side.
- Your browser should download a
.zipfile. (For the example project, it will download just a.pyfile.) - You need to extract the
.zipfile before you can work with the files inside. On a Mac, double-clicking should work, on Windows after double-clicking you may need to click on the "Extract all" button.
Download and extract the starter files for the example task now to make sure you know how to access starter files.
Step-by-step instructions for uploading your code
- Go to the CS111 Potluck Server and authenticate.
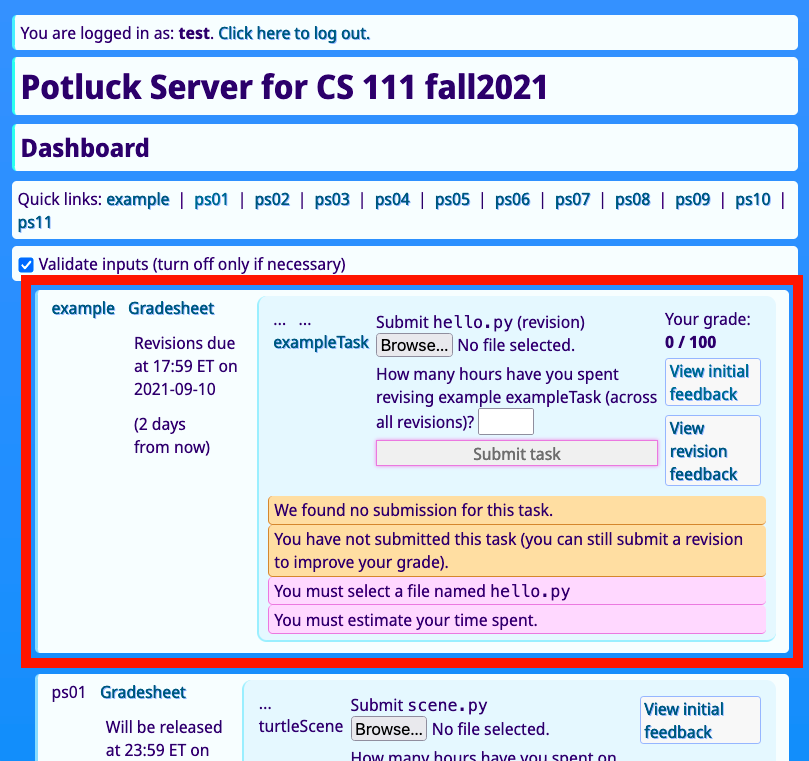
- You'll see Potluck's dashboard.
Note that each task has a light blue background right now. This example will focus on the "example" project, which has only one task called "Example Task" (in the red rectangle below)
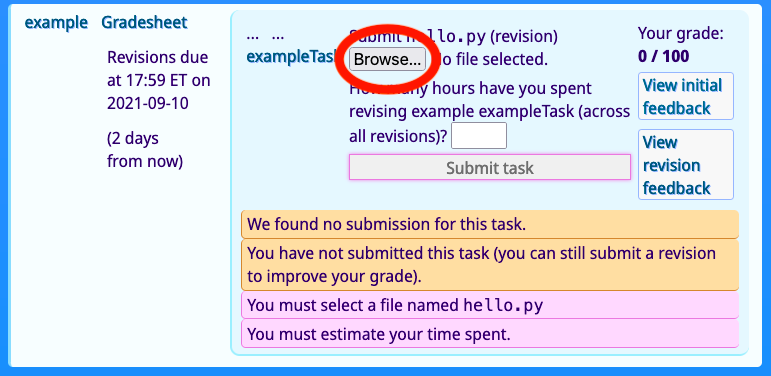
- Click on "Choose File" and browse to find the
hello.pyfile in the lab01 starter files. Note that your selected Python file must have the exact namehello.py, any other file name will generate an error.
-
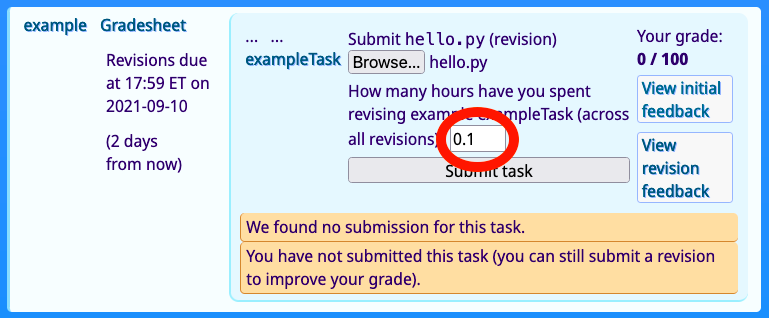
Enter a number in the box following "How many hours have you spent on this task (across all attempts)?". If you type a word like "two" Potluck will remind you to enter a number. Your hours spent may be an integer (eg 3) or a decimal (eg 3.5).
-
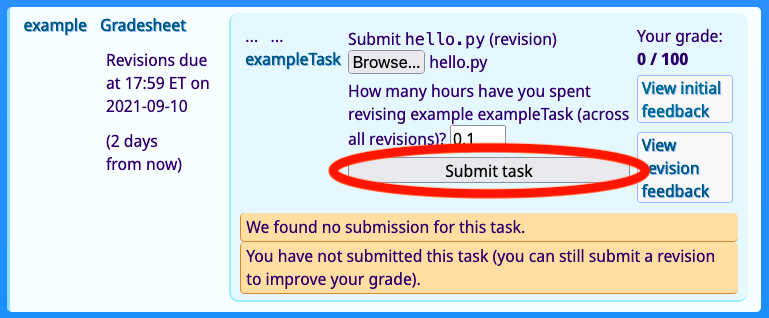
Click on the "Submit task" button (it is disabled until you select a valid file and enter your time spent)
-
This will bring you to a new window.
Note that the text at the bottom initially says "Evaluation is still in progress".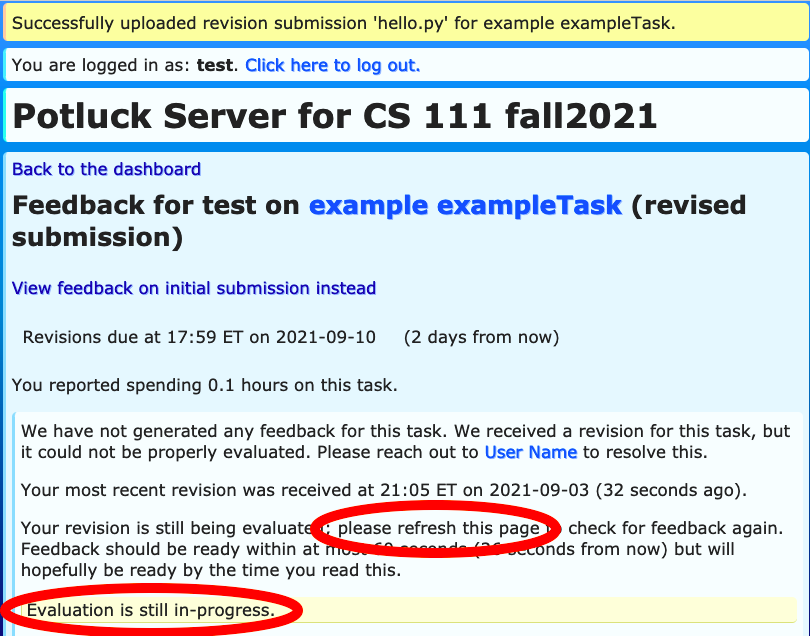
-
Wait for the page to refresh itself, or click refresh to see the results of your code evaluation (note that it's possible for more complex tasks to take a bit of time to be evaluated but most tasks should be done in 10 seconds or less, and the evaluation process will be terminated if it takes longer than 60 seconds).
If you submitted the starter file (as we instructed), you should see a message which warns about this. If you scroll down, you will see a report showing that one of the two goals was accomplished but the other was not: the starter file does useprint, but it does not print the correct message.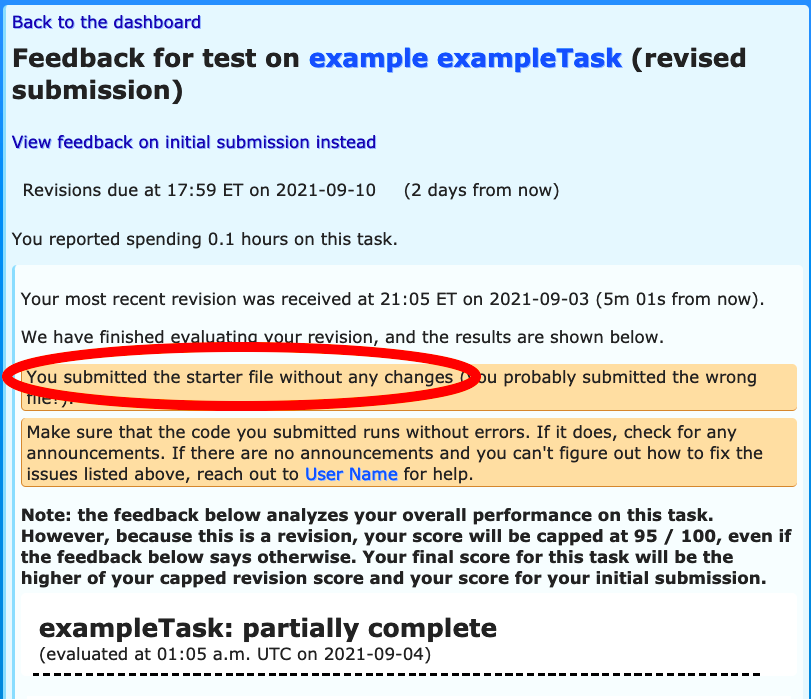
- Now, we should edit the
hello.pyfile to fix the issue and submit another revision. Use Thonny to openhello.py, and add 'world' plus an exclamation mark (inside the double-quotes) it so that it looks exactly like this:print("Hello world!")In your browser, use the link near the top to go back to the dashboard, and submit it again.
You will have to refresh the page one more time, after which you should get a message in green which says "Your submission is at least partially complete."
It will look like this: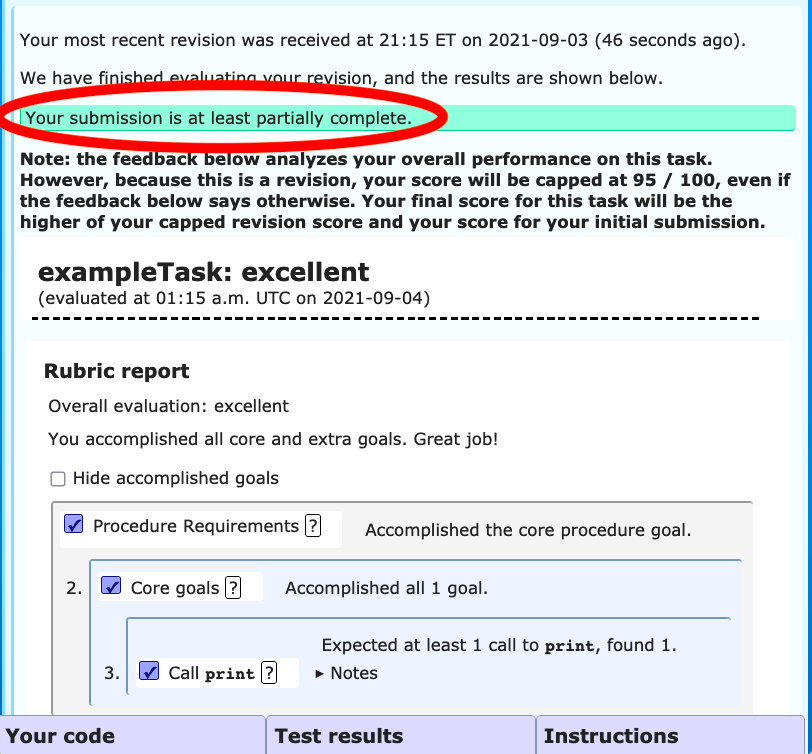
- You can view full feedback immediately for every submission you make.
When you scroll down, the rubric report should now indicate that both of the goals are met, which looks something like this:
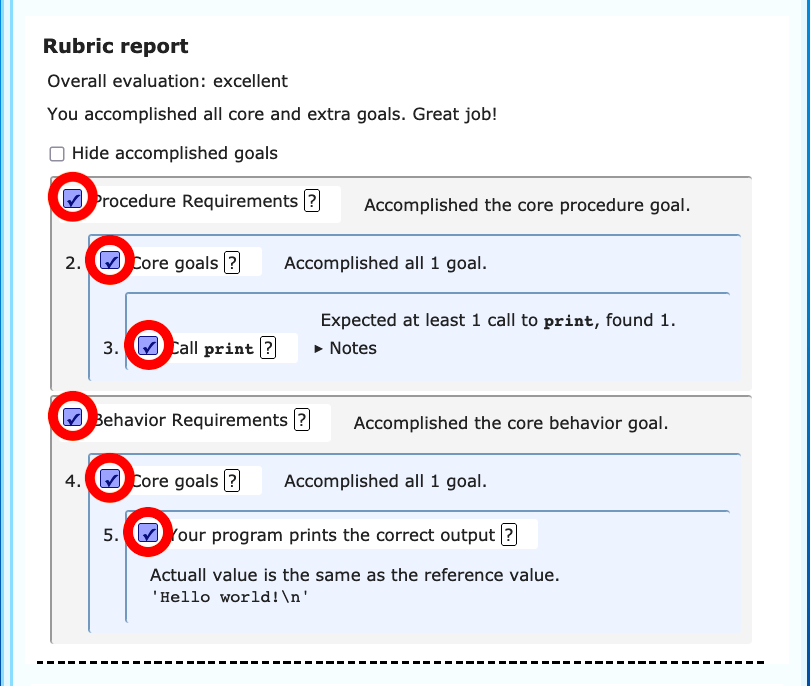
Note that included in the feedback is a copy of your submitted code, as well as a report listing test results which were produced while evaluating the goals. It also includes a copy of the task instructions.
- Go back to the Potluck dashboard again, using the "Back to the dashboard" link.
- Back at the Potluck dashboard, note the following:
- the background of the exampleTask entry is now green, and it should
have a check mark for the initial submission in the upper-left (in
contrast to the light blue backgrounds and ellipses for other
unsubmitted tasks)
(Note that your image should have just a check mark without an ellipsis before it)
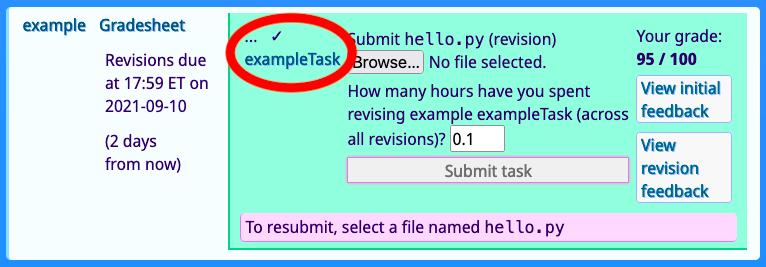
- you can resubmit your
hello.pyfile multiple times, like we just did, and you can see feedback each time. Basically, you can revise things until you like your score.
- the background of the exampleTask entry is now green, and it should
have a check mark for the initial submission in the upper-left (in
contrast to the light blue backgrounds and ellipses for other
unsubmitted tasks)
Table of Contents
- Lab 1 Home
- Part 1: Thonny intro
- Part 2: How to work on projects
- Part 3: Your first program
- Part 4: Multimedia exercises
- Part 5: Save your work