Lab 1: Part 1: Lab workflow setup
Each lab, you will start by downloading a folder from the cs.wellesley.edu server that contains starter code we provide.
This will be done via a SFTP program called Cyberduck, which allows you to send files to and from computers/servers.

Cyberduck is already installed on the lab computers, and you can download it here when on your home computer.
Open Cyberduck
On your lab computer click the Spotlight tool (magnifying glass on the top right of the screen), and search for Cyberduck to locate it on your computer.
Once Cyberduck is loaded, on the top left corner of the window, click Open Connection icon:
This will open a new window that looks like this:
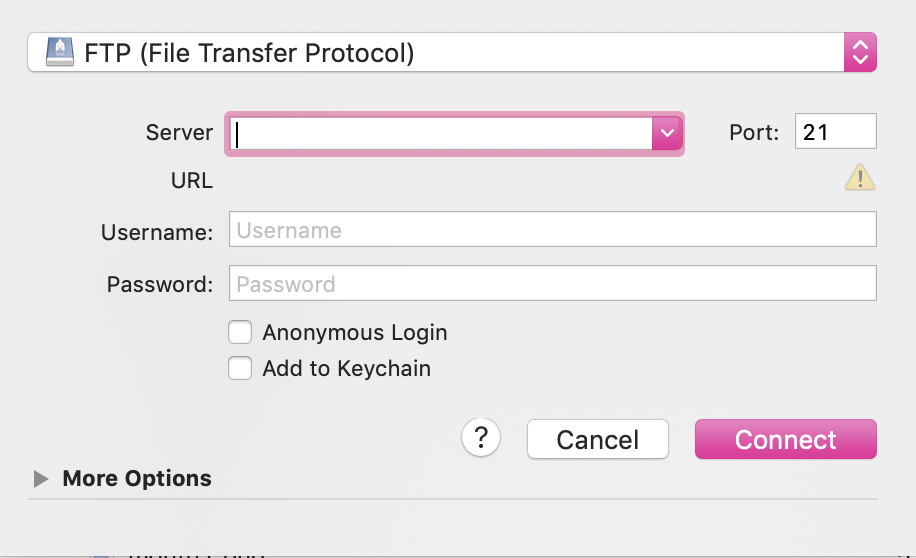
- Select or fill in each part as indicated by Steps 1 through 5 below
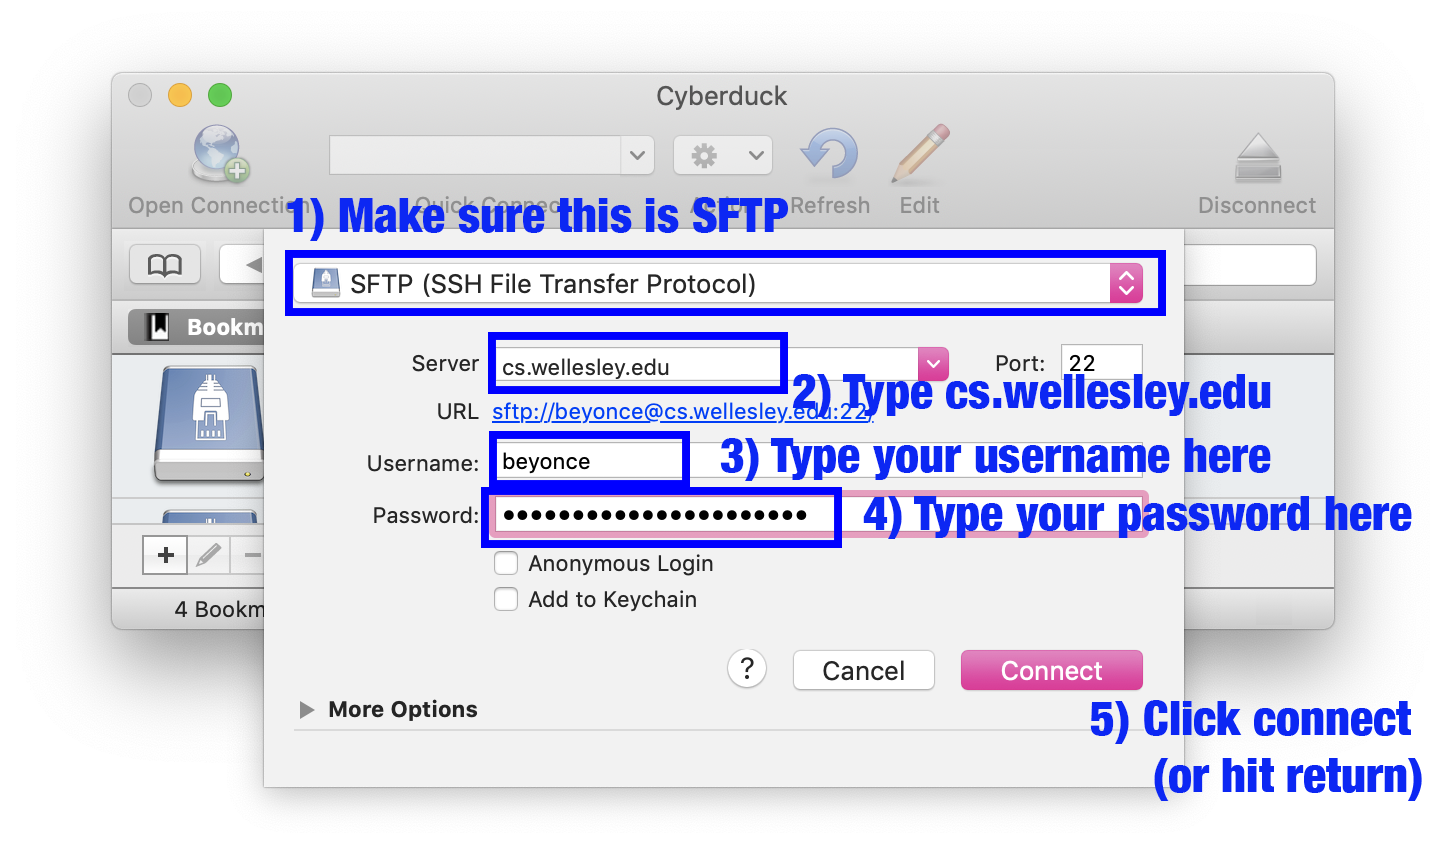
-
If your login is successful, you will see something like this:
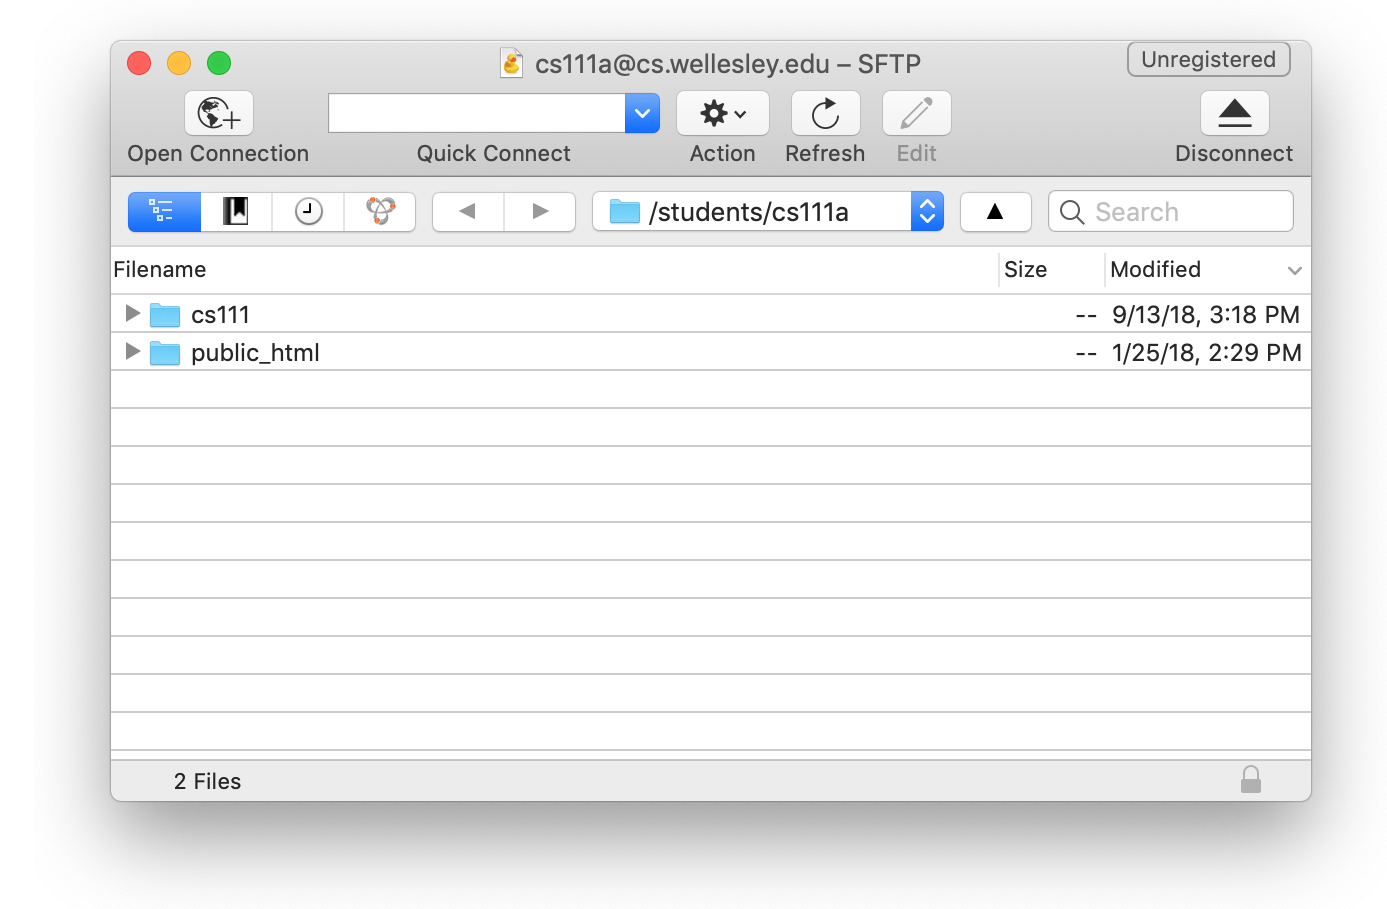
Navigate into the cs111 folder (by double clicking it), and then navigate into the download folder.
This download folder is a special directory that every student has access to. We (the instructors) can place files in this folder and it will be accessible to all students. Think of it as a shared folders that you (the students) can read, and we (the instructors) can read/write.
Within the download folder, locate the lab01 folder and drag it to your Desktop. Once the folder is downloaded, open it to familiarize yourself with the contents.

Table of Contents
- Lab 1 Home
- Part 1: Thonny intro
- Part 2: How to work on projects
- Part 3: Your first program
- Part 4: Multimedia exercises
- Part 5: Save your work