Lab 3, Part 5: Baby Quilt Pictures
Reference
Review
- What is
picture.py? - How does it relate to
cs1graphics.py? - Recap some available
picture.pyfunctions:patch(color)Returns a picture of a square, filled in with the specified colordisplayPic(p)Displays a given picture; function you'll use to display any pictures you createoverlay(p1, p2)Returns a new picture in which p1 is overlayed on top of p2fourPics(p1, p2, p3, p4)Displays four pictures in clockwise order, starting at the top left quadrantempty()Returns a empty, transparent picture; can be useful for spacingtriangles(lowerLeftColor, upperRightColor)Returns a square with colored lower left and upper right triangles- Etc... Refer to the
picture.pyfile to see what other functions are available.
Setup
In your lab03 folder, create a new file called quilts.py.
After adding the usual identifying comments at the top of this file (name, date, assignment, etc.), include the following line to import the picture functions you'll need in this task.
from picture import *Note: picture.py is included in the lab03 folder. If Canopy does not find this file when you run your code, check that your working directory is synced to your lab03 folder.
Task 1
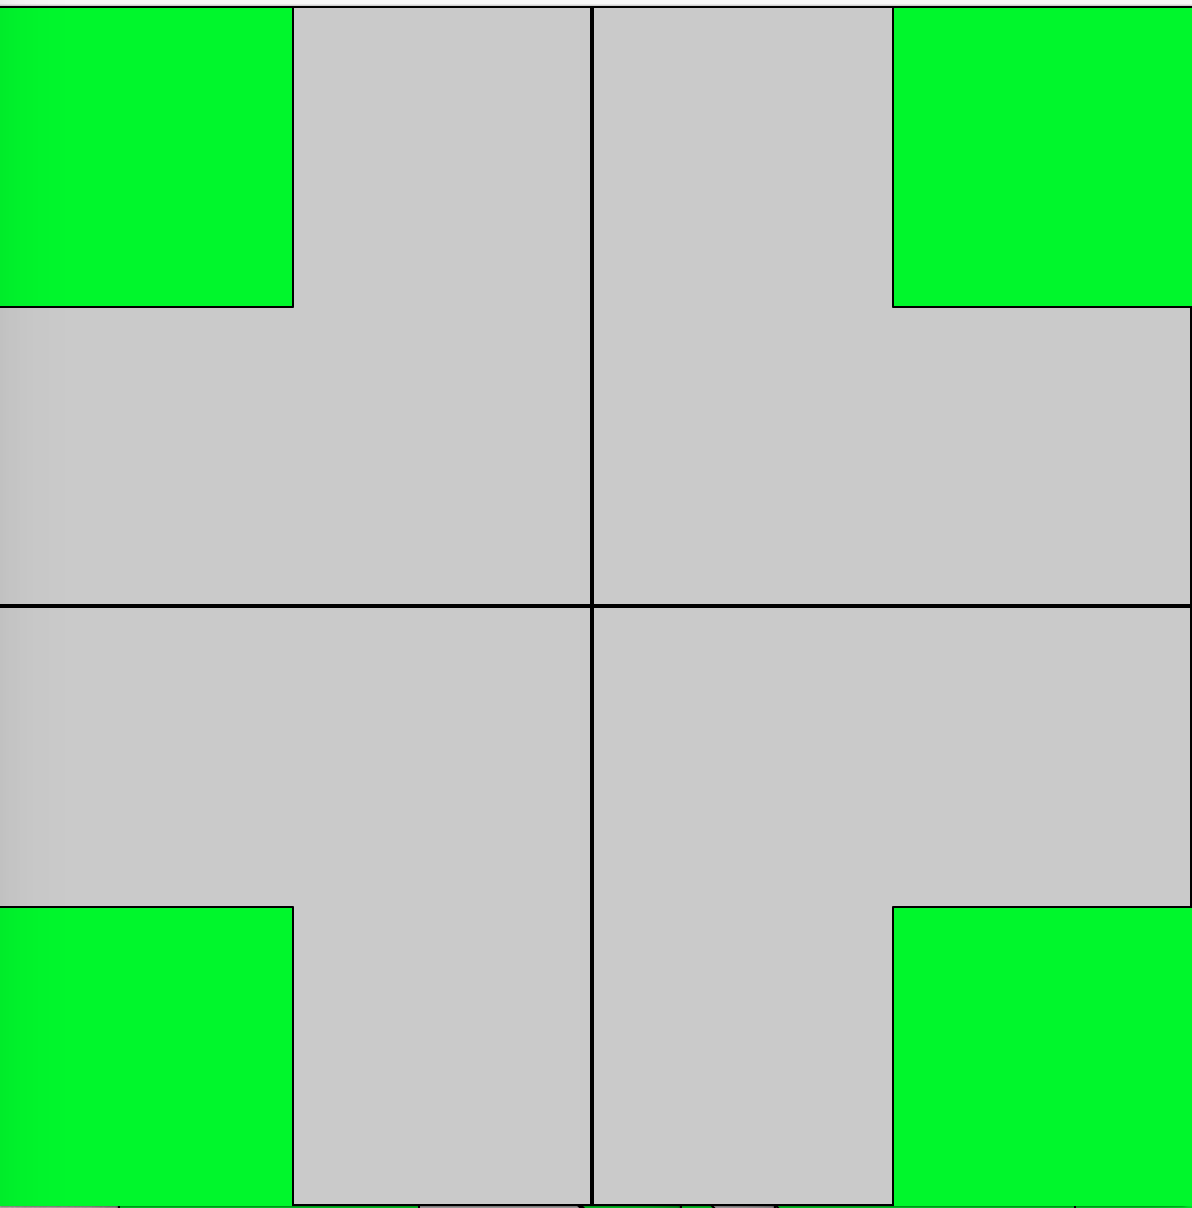
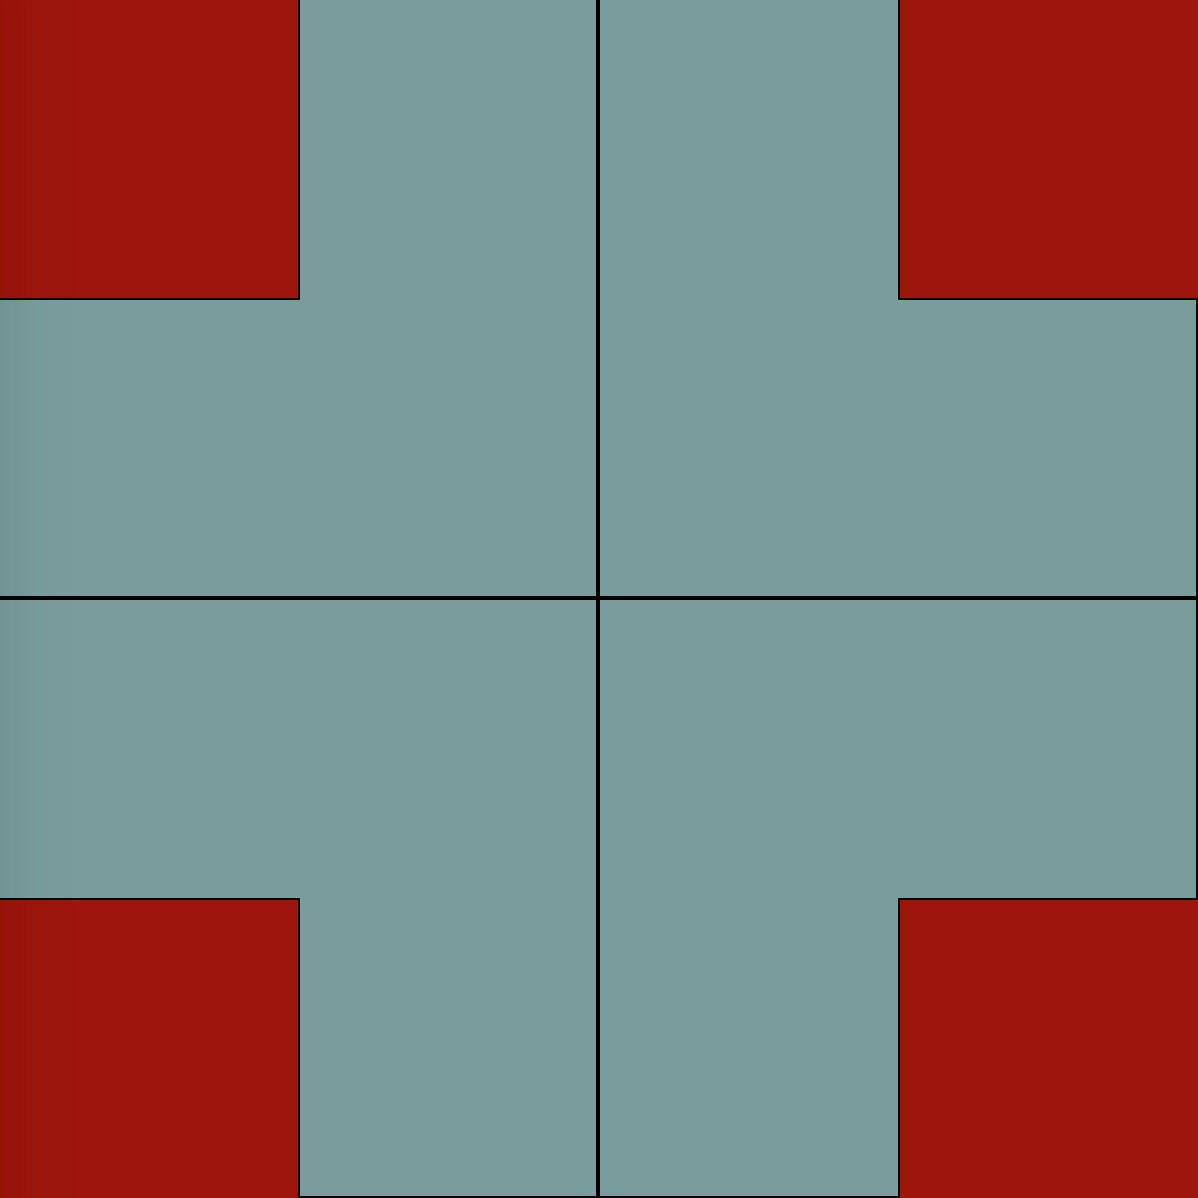
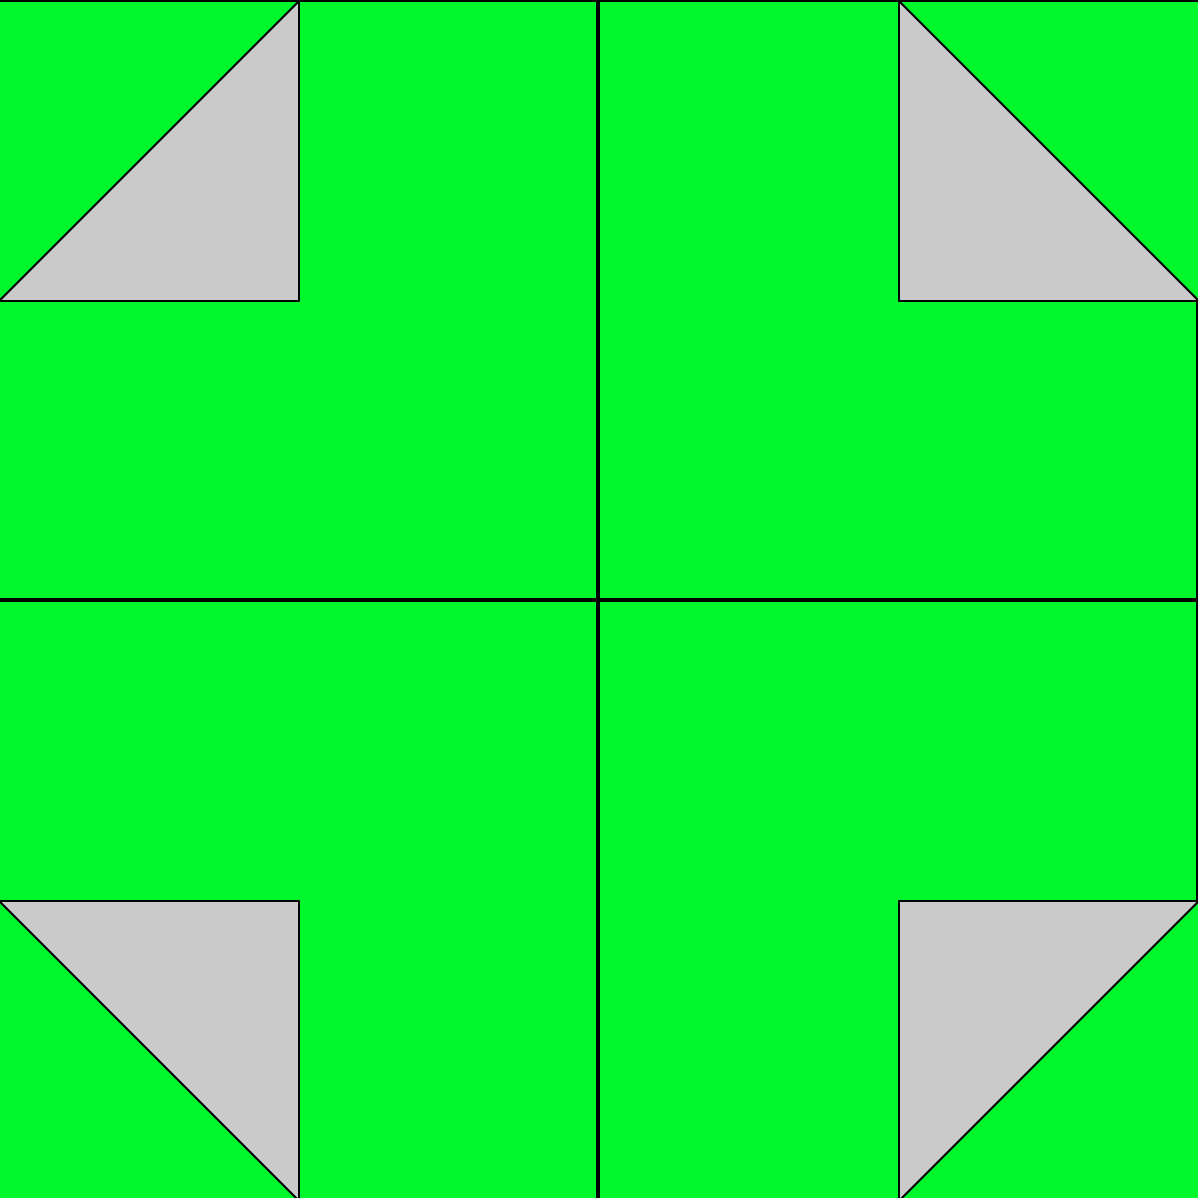
Your first goal is to write a function called plusSign that takes two color parameters and returns a picture that looks like these examples:
plusSign('green','gray') |
plusSign('darkred','paleturquoise4') |
|
|---|---|---|
 |
 |
First, make a mental note of what functions provided in picture.py might help you accomplish this task.
- ?
- ?
- ?
- Others?
Next, focus on just one quadrant, the upper right:
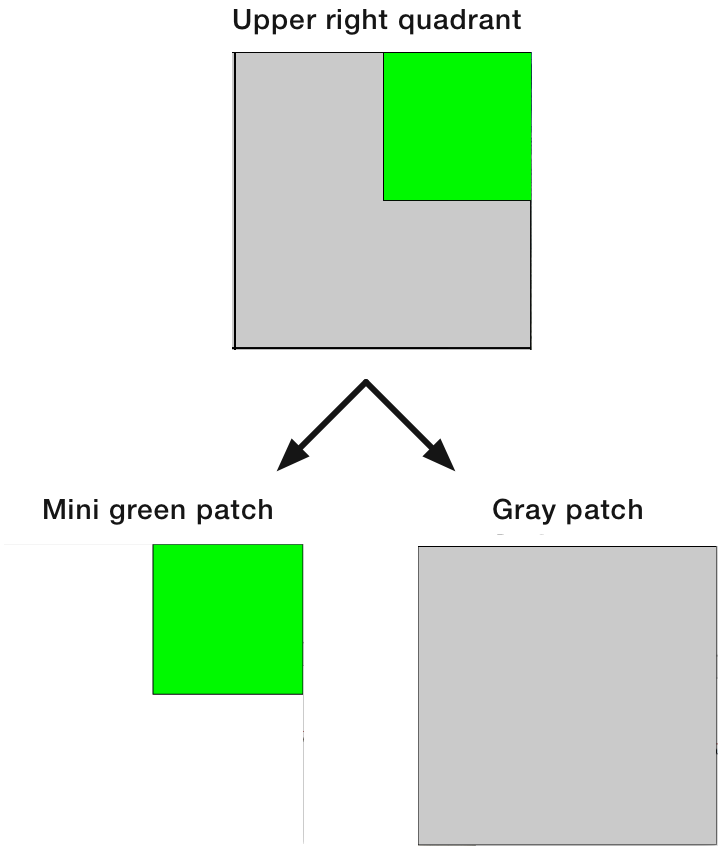
Note how this quadrant is a composite of 2 pictures, a mini green patch, and a gray patch.
One approach to this task is to define separate functions that can help us create these individual pieces, and then glue them together.
For example...
Function 1
upperRightNest(p1)
A helper function to nest a picture (p1) in the upper right corner at 1/4 the original size. Can be used to create the mini green patch:
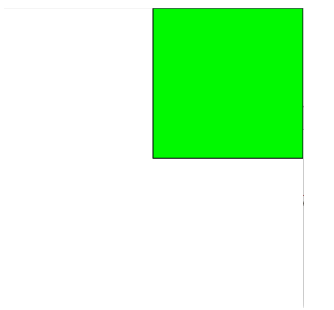
Test:
displayPic(upperRightNest(patch('green')))Should use: Any function(s) from picture.py you might need.
Function 2
block(c1, c2)
A helper function to create the upper right quadrant of the final picture, i.e. the mini green patch on top of a gray patch:

Test:
displayPic(block('green','gray'))Should use: upperRightNest, and whatever function(s) from picture.py you might need.
Function 3
plusSign(c1, c2)
The “glue” function that utilizes the above 2 helper functions to create your final picture.
Test:
displayPic(plusSign('green','gray'))Should use: upperRightNest, block, and whatever function(s) from picture.py you might need.
Task 2
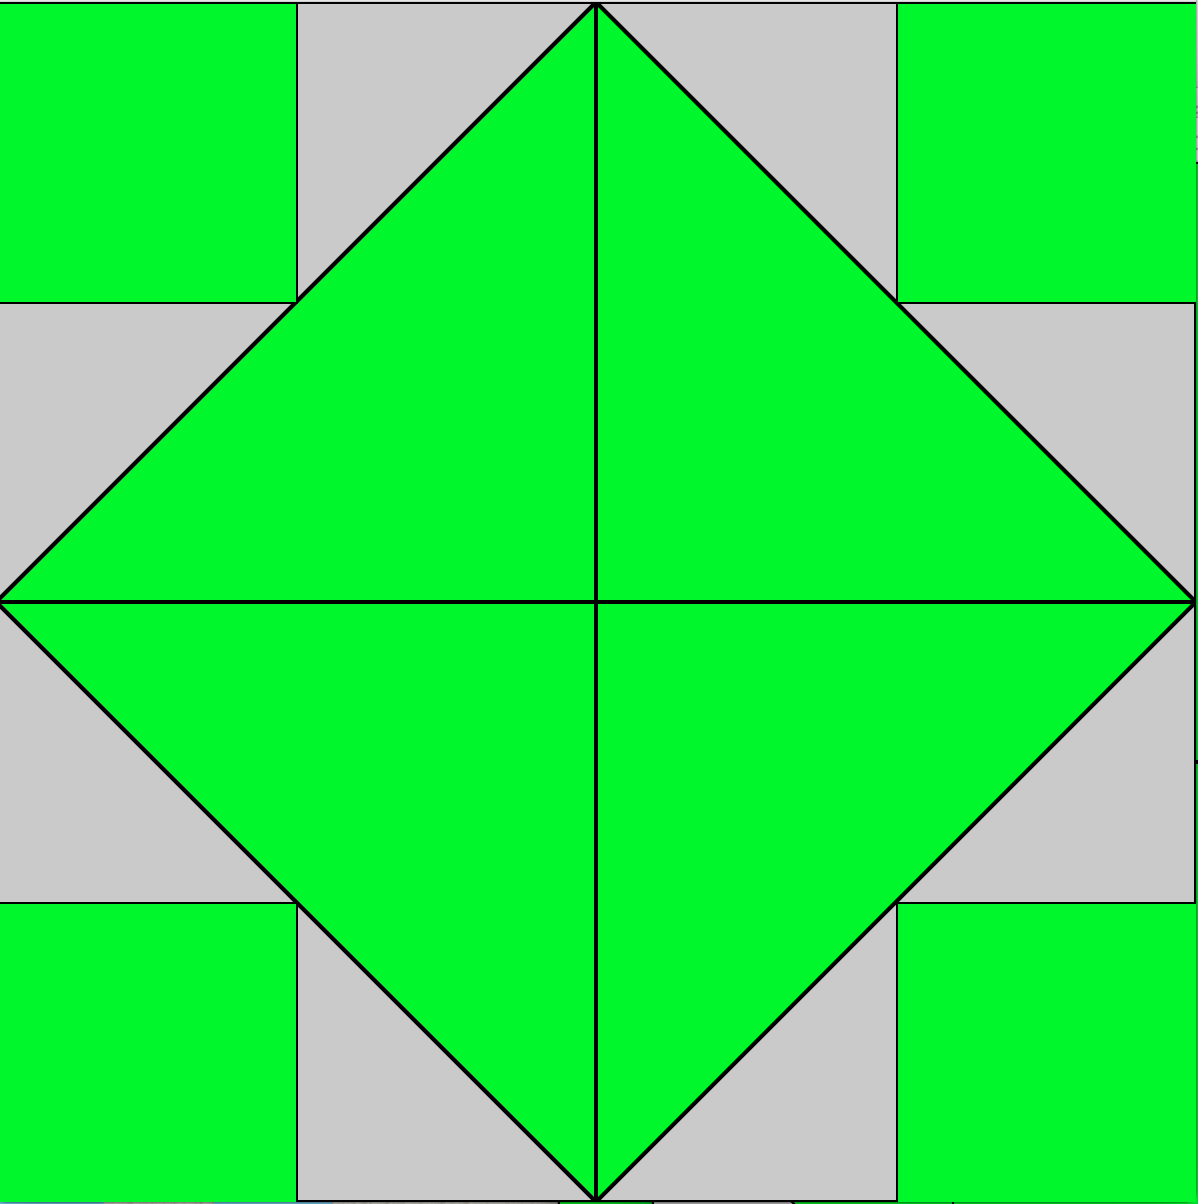
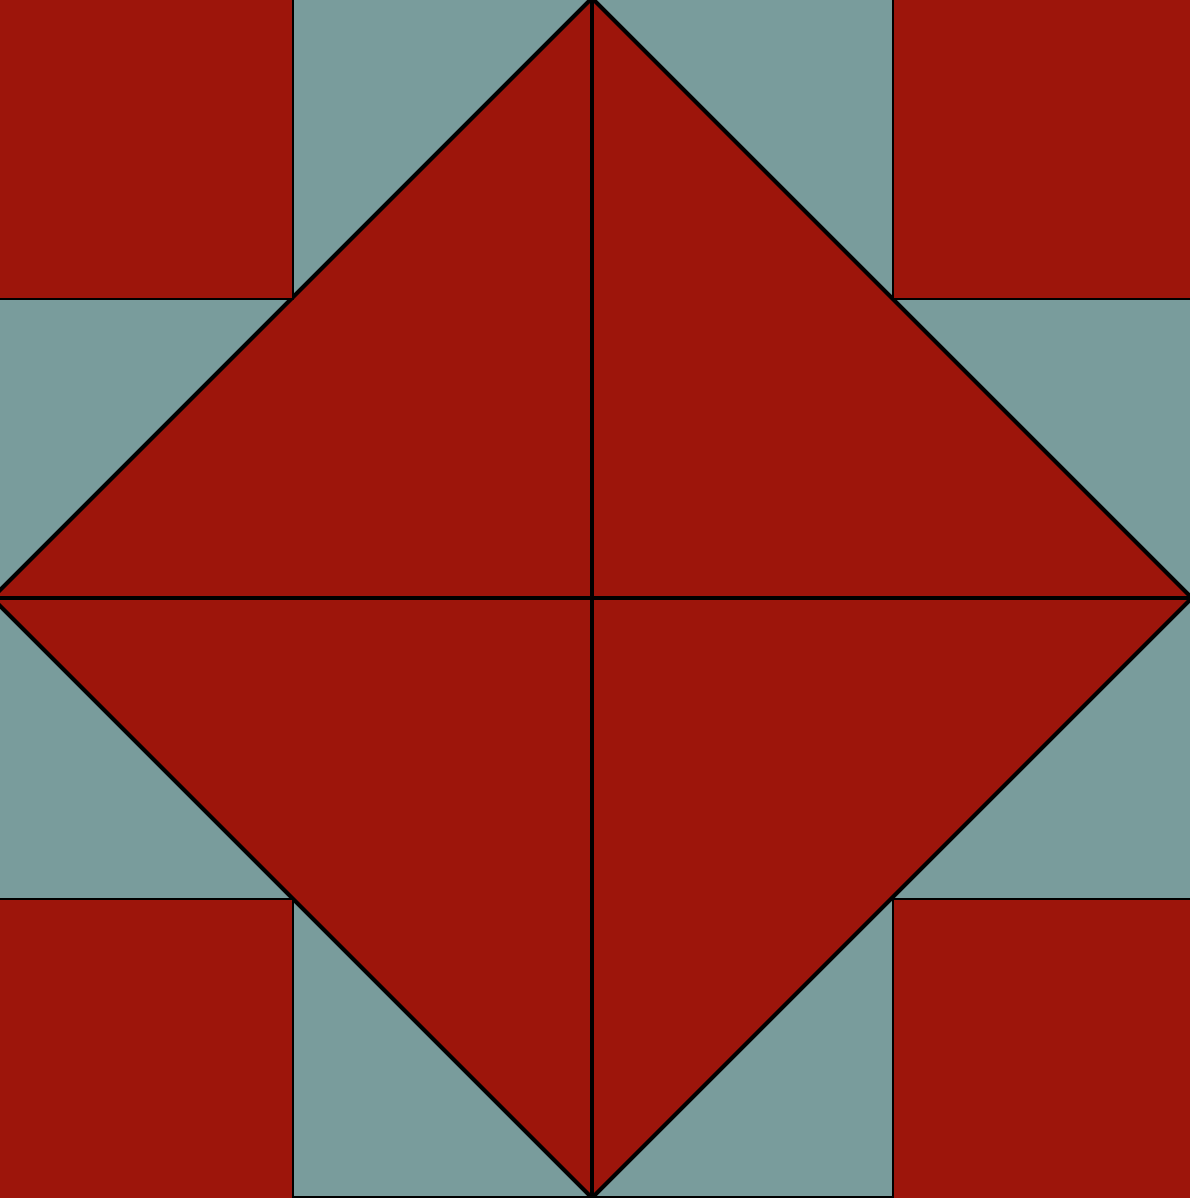
Following similar strategies employed in Task 1, write a function called diamond that takes two colors and returns the picture shown below.
Your function must work for any two color parameters.
You can use any of the helper functions you defined in Task 1, as well as any of the functions in picture.py.
diamond('green','gray') |
diamond('darkred','paleturquoise4') |
|
|---|---|---|
 |
 |
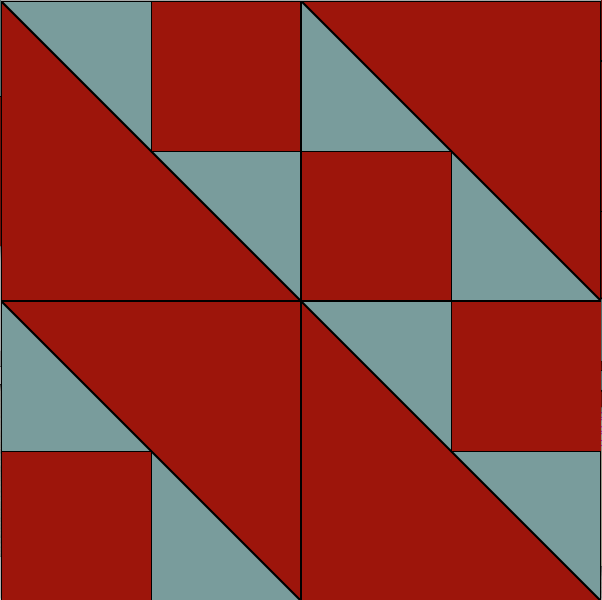
Task 3
Write a function called stripesAndSquares that takes two colors and returns the picture shown below. Your function must work for any two color parameters.
stripesAndSquares('green','gray') |
stripesAndSquares('darkred','paleturquoise4') |
|
|---|---|---|
 |
 |
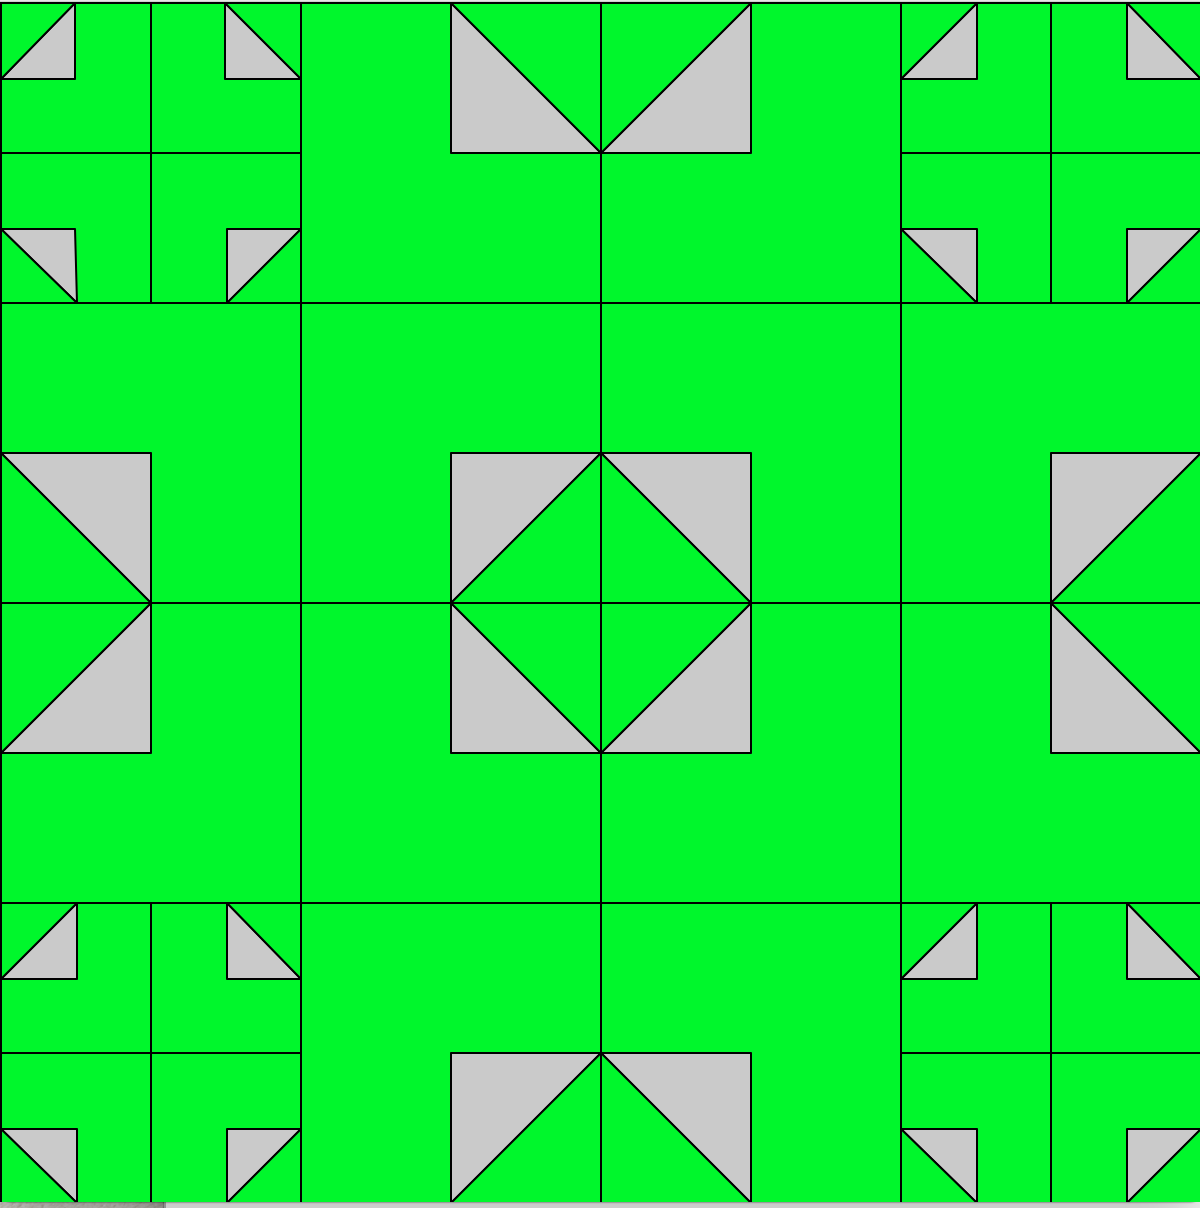
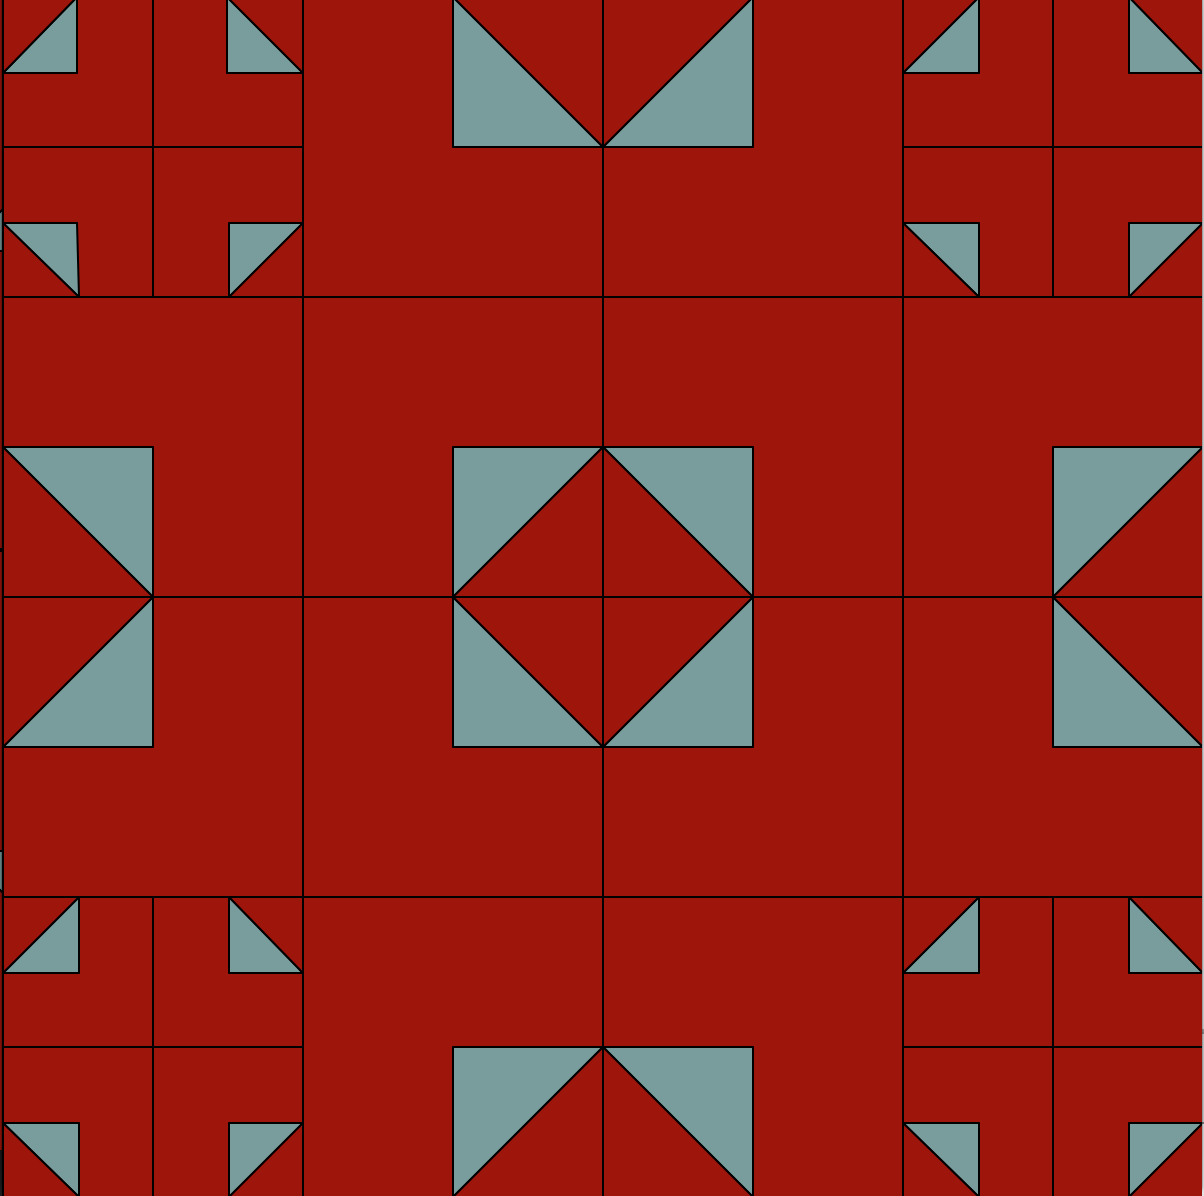
Task 4: A quilt with 'folds'
Write a function called fold() that takes two colors and returns the picture shown below. Your function must work for any two color parameters.
fold('green','gray') |
fold('darkred','paleturquoise4') |
|
|---|---|---|
 |
 |
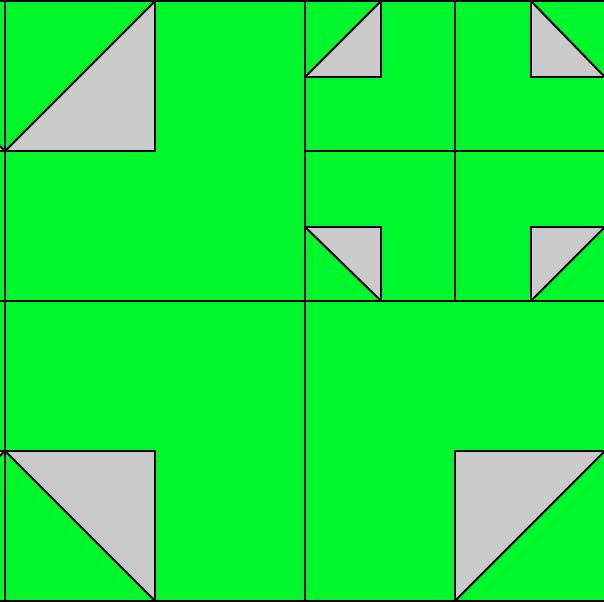
Task 5: And an even fancier quilt
Write a function called fancyFold() that takes two colors and returns the picture shown below. Study the upper right quadrant carefully before you begin to code. Try to work out on paper how the quadrant (shown below) is constructed.
fancyFold('green','gray') |
fancyFold('darkred','paleturquoise4') |
|
|---|---|---|
 |
 |
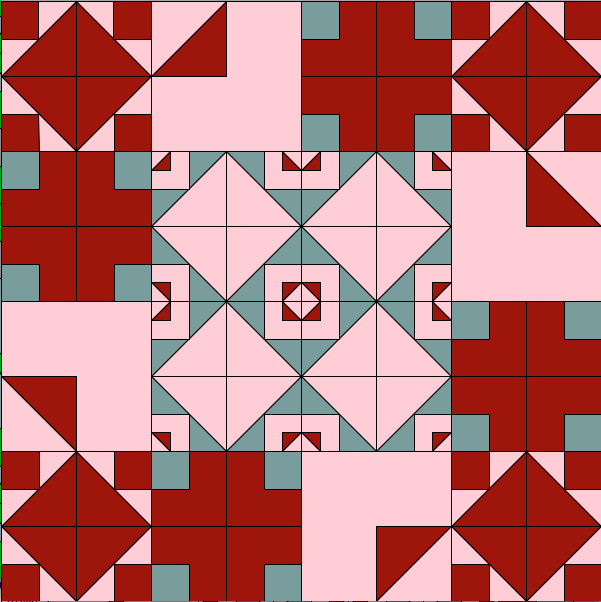
Task 6: The hanky quilt (time permitting)
Write a function hanky that takes three colors and returns the picture shown below. Again, start by studying the quilt first, then think about your code.
hanky('green','gray','lightblue') |
hanky('darkred','paleturquoise4','pink') |
|
|---|---|---|
 |
 |