CS307: Keyboard and GUI Controls
Plan
- Recap: Solution to the "Two Barns" exercise
- Review the reading
- Defining an object origin for positioning
- Exercise: Make a church (add a steeple to the barn)
- Keyboard and GUI controls
- Exercises: Adjust steeple height with keyboard and GUI controls
- (optional) Exercise: Add a "hex sign" to the church
Recap Exercise: Two Barns
Modify the barn code
to add a second barn that is
- half the size of the first barn
- shifted to the left of the first barn, leaving a gap between
the two barns
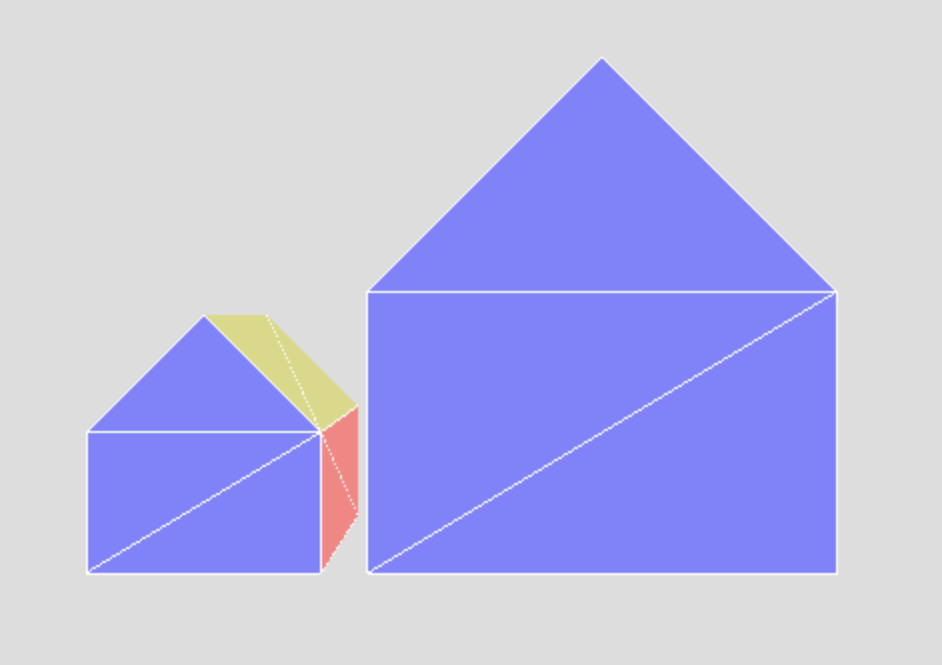
Adjust the bounding box so that you can see the two barns in
their entirety. Your result might look something like this:
A possible solution: two-barns.html
Object Origins
The code to set the position of the barn is simple, and relies on a key concept,
which is the notion of the position
of the barn. We define this as
the location of the barn's origin
, which in this case, is the lower left
front corner. For built-in geometries, the location of the origin is given, for
example, it's at the center of a THREE.BoxGeometry or
THREE.SphereGeometry. For geometries that we create from scratch,
the choice of where to place the origin is somewhat arbitrary, but some choices
may simplify the specification of vertex coordinates or placement of
the geometry in the scene. We'll see more about this next week.
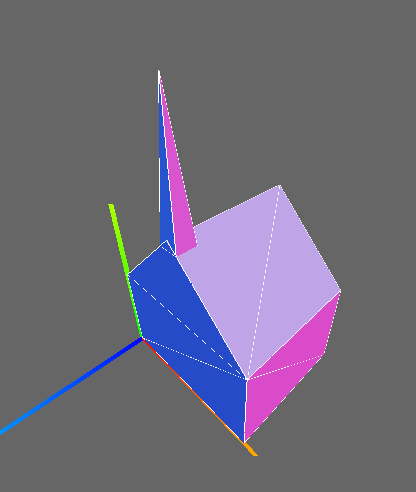
Adding a Steeple
Now, let's discuss adding a steeple to our barn to convert it into a
church. The result will look like this:
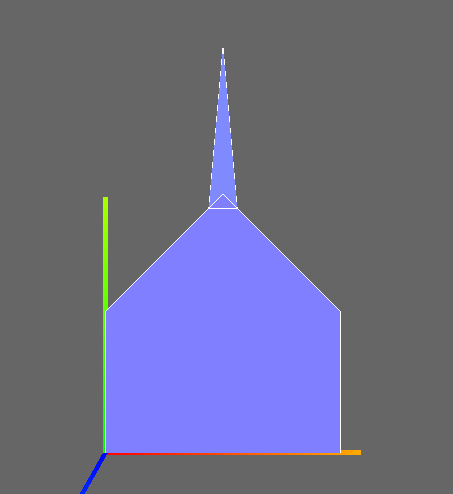
The pictures above were based on the following:
- The barn has width 50, height 30, and depth 40
- The steeple is right in the middle of the ridge
- The steeple's base is a square, 6 units on a side
- The steeple is 36 units high, from base to tip
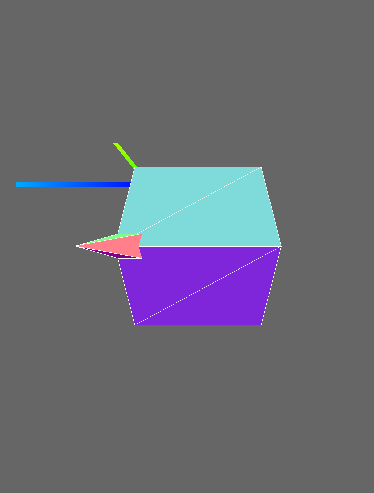
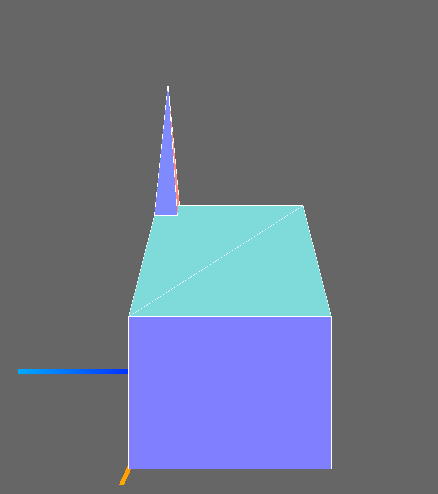
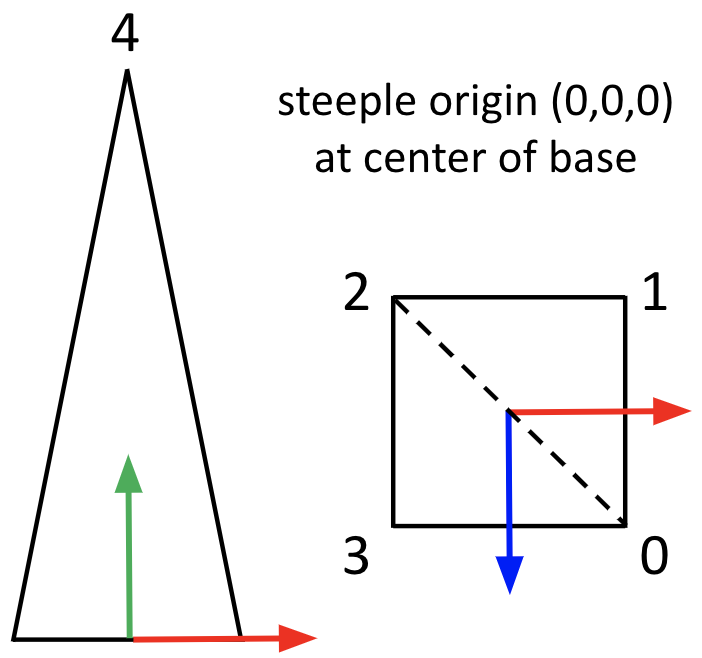
Here's now the steeple might look in wireframe
from the front and
from above, with the X (red), Y (green), and Z (blue) axes shown. We will create
a steeple geometry with its own origin at the center of its base.
The code that will be the starting point for this exercise has a
partial definition of a function createSteeple() that
creates and returns a geometry for the steeple:
/* Returns a geometry object for a steeple. The origin is
   at the center of the base, so the base vertices are at
   y=0, and x and z at plus or minus half the width */

function createSteeple(width, height) {
    var geom = new THREE.Geometry();
    var w2 = 0.5*width;

    // create the vertices for the base and top
    geom.vertices.push(new THREE.Vector3(+w2, 0, +w2));

    // insert code for the remaining four vertices

    // use the vertices to define the triangle faces

    // base - the front side faces the ground
    geom.faces.push(new THREE.Face3(0, 2, 1));
    geom.faces.push(new THREE.Face3(0, 3, 2));

    // insert code to create the four side faces

    // calculate the normals for surface colors
    geom.computeFaceNormals();

    return geom;
}
Exercise: Make a Church
Using barn-steeple-start.html as a starting
point, modify the code to do the following:
- Complete the definition of
createSteeple() by adding code
for the remaining four vertices and four faces
- Create variables to store the dimensions of the steeple
- Invoke the
createSteeple() function to create the geometry
- Make a mesh using
TW.createMesh()
- Add the steeple to the scene, positioning it using
position.set()
- Adjust the bounding box in the call to
TW.cameraSetup() so that
you can see the entire church
Your finished code should should look something like this
barn-and-steeple.html
Review Reading
Next two sections
Keyboard Controls
To implement a new keyboard control (e.g. the
adjustable box), you need
- one or more global variables, used by the scene modeling code
- a callback function that modifies the global variable(s) and then
rebuilds and redraws the scene
- a binding of the callback function to a key,
using
TW.setKeyboardCallback(key,function,docstring) (call
this function after TW.mainInit())
The first slide in this handout
shows a simple example of a keyboard control.
GUI Controls
To implement a new GUI control (e.g. the
adjustable box with GUI), you need
- one or more global object variables that contain parameters to be controlled,
with initial values
- one or more callback functions that are called when the user modifies
one of the parameters, and rebuild and redraw the scene
- a new
dat.GUI object
- calls to the
add() method and onChange() event
handler that specify a global object variable, parameter, range of values for
the slider, and callback function
The second slide in this handout
shows a simple example of a GUI control.
Exercise: Adjust Steeple Height with a Keyboard Control
Save this slightly modified version of
the church code
to use as a starting point.
The important part is:
var steepleHeight = 36;   /* global variable to be controlled */
var steepleWidth = 6;
var steepleMesh;

function placeSteeple(steepleHeight,steepleWidth) {
    var half = steepleWidth * 0.5;
    var steepleGeom = createSteeple(steepleWidth,steepleHeight);
    steepleMesh = TW.createMesh(steepleGeom);
    steepleMesh.position.set(barnWidth*0.5,
                             barnHeight+barnWidth*0.5-half,
                             -half);
    scene.add(steepleMesh);
}
Implement a function to
- remove the current steeple
- increment the height
- create a new steeple and place it on the barn
- redraw the scene
Add a keyboard callback to your code that allows you to grow the
steeple by entering the '+' key.
Tip: Call TW.setKeyboardCallback()
after TW.mainInit()
Your result might look
like church-growSteeple.html
(Optional) Add a second keyboard callback to your code that makes
the steeple shorter when you enter '-'.
Exercise: Adjust the Steeple Height with a GUI
Modify your code from the previous exercise to
use a GUI control instead of a keyboard control, to adjust the height of the steeple
(you may want to create a copy of your previous code to use as a starting point
for this exercise).
Your result might look like
church-growSteeple-GUI.html
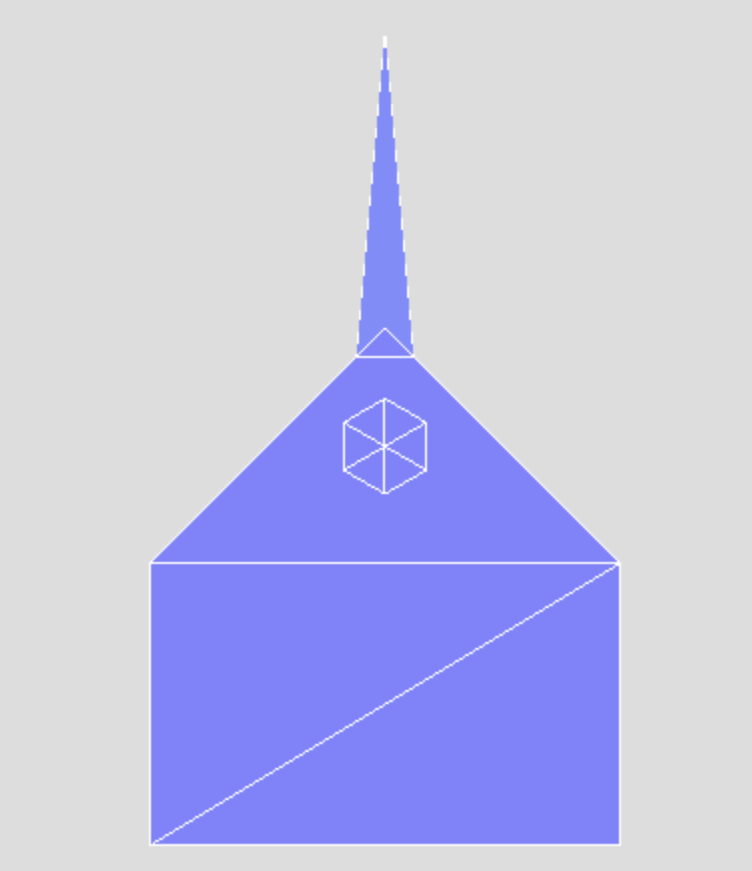
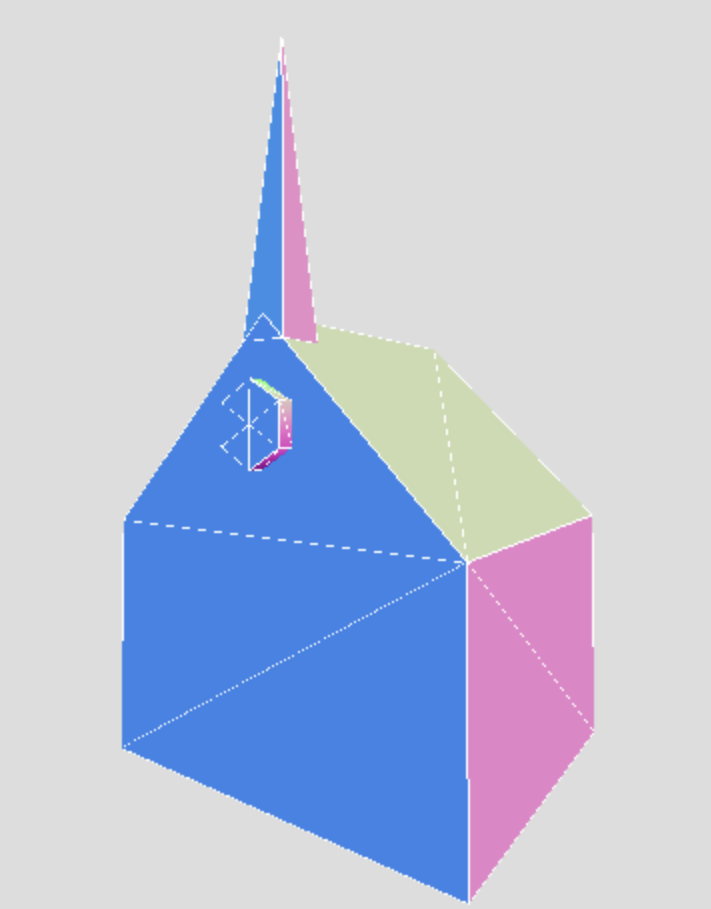
(optional) Exercise: Add a Hex Sign
Barns in Pennsylvania Dutch country often
have hex signs on
them. They usually aren't actually hexagons, but ours will be, as
shown in the two pictures below:
A simple hexagon-shaped sign can be created with the built-in
THREE.CylinderGeometry.
Examine the documentation to see how you can construct a (very
short) cylinder with only six flat sides. (Note that the example
in the documentation assigns a new instance of a
THREE.CylinderGeometry to a constant (const),
but you can create a variable (var) instead.)
Position your "hex sign" on the front of the church, as shown above.
You'll realize that the sign also needs to be rotated.
A THREE.Mesh object can be rotated as follows:
myMesh.rotation.set(xr,yr,zr);
where xr, yr, and zr are
the desired angles of rotation around the x, y, and z axes,
respectively, specifed in radians.
Here is a sample solution
Reminder: General Coding Tips
- Build and test your code incrementally. Save often!
- Save versions by saving the file to a different filename
(
ex1.html, ex2.html, ...) It will be easier
(emotionally) to experiment with things if you know you can go back to
an earlier version.
- Be willing to create a simple
test
program to see how something
works without all the complexity of your larger program.
- Be modular, and document as you go. It'll be easier to understand
and debug your own code.
To Do for the Next Class